
The longevity of cranks depends on how you well-maintained your mountain bike crankset. That means if you own a mountain bike, then removing and installing cranks is something you’ll need to do on occasion for maintenance. Also, if you want to fit a nice shiny new set or upgrade your old MTB crank set. Here we will talk about how to remove and reinstall the cranks on your mountain bike, crank type, and some related asking over the crankset service process.
Are All Cranksets Same or Universal?
It is a big NO. Usually, the cranks are not interchangeable. Because every crank is designed to function with a specific bottom bracket. But sometimes you probably can do that if the sprockets type, chain width, spacing between the chainrings are the same. You see, there are huge numbers and measurements that have to be matched. The most important thing is both of the chainsets must have to match with each other.
The crankset or chainset generally consists of crank arms, bottom bracket, and chainrings. And, our main issue is about replacing cranksets, right? So we have to understand the bike crankset types. The Cranksets come in 3 main formats- single, double, or triple.
- One-Piece: Here, the axle and crank arms are the single piece of steel/aluminum attached together. This type of crankset format is generally for the Kid’s Bike.
- Two-Piece: This type of MTB crankset format features the axle integrated into one of the crank arms. So if the diameter of the axle is the same, then one can easily upgrade or replace it with a 3-piece crank set.
- Three-Piece: It is common in MTB crankset format in the freestyle mountain bike this day. In this style, two crank arms are separately attached with a splined axle.
There is also a type of MTB crankset, which is known as ‘Race Cranks’ or XC Racers. It features an external bottom bracket (BB) and carbon or aluminum crank arms to save extra weight. Race crank types are available in 2 or 3-pieces versions.
In the modern-day, two-piece and three-piece cranksets (Crankset MTB 3x) are used in most mountain bike crank systems. So if you want to replace or upgrade your crankset, you should go for it. And the other crank identification category is – self-extracting or non-self extracting crank system.
What Are The Common Problems With MTB Crank Set?
This heading should be given as common problems or how do you know when to replace or inspect your mountain bike Crankset or chainrings. But I won’t, why? Because I want to keep it simple. In my workshop, I and Mike have seen the most common problem with the crank arms are-
- feel like losing themselves, grinding feelings, or cranky sound from the pedals, or sleeping the chain shortly.
These types of problems generally occur due to installing cheap pedals, cheap cranksets, or installing the crank set or chain-rings incorrectly.
So when you install the crank arms incorrectly, it is obvious that you have to crash hard to bend your crank arms. For solving the problems, the crankset or pedals may need to be replaced or an instant cleaning service. And, when you know about how to replace your crank set and the installing process, the whole thing can be done at home very easily.
How To Remove, Replace and Install MTB Crankset?
When we own a rider like a bike type, then it is a big plus to know about changing bicycle crank arms. Because it is fruitful not only changing crankset but also for maintenance purposes.
The Tools Are Required for Servicing Crankset:
- Torque Wrench
- Set of Allen Keys– 4mm, 5mm, 8mm, depending on your crankset configuration. (Large socket with an Allen socket)
- Open-ended wrench– especially for changing the pedals and chain guide if required.
- Maybe a soft rubber or plastic mallet
- Flat Head Screwdriver– to remove dust cap or top cap
Maintaining Purposes
- Multipurpose or Waterproof Grease
- Rubbing Alcohol
- Paper Towels for cleaning purposes.
The above tools are simple, not hard enough to handle. It is good to have a work stand for a stronghold when we do any kind of replacing service in our MTB bikes.
Removing Crankset:
To describe the removal and install procedure, I am taking a self-extracting 2-pieces crank system (Shimano type) as an example. Cranks are slightly different in mechanism in terms of brands or types, but the principle of removing is the same. What I want to say is- don’t bother about what is your crank is. When you go for removing the crankset, you will naturally get all the things like Allen key’s size and tightening the set.
- If you don’t have a work stand when changing your Mtb crank, then you just leave the bike on the ground. But be careful about the chain tension.
- Now chain off from the chainrings. If there is a derailleur with a bolt, just lose it down.
- Now take a bottom bracket tool or simply a flat screwdriver to remove the top cap or dust cap from the crank arm, if there are any. Some brands may not use a pre-load cap, it varies from brand to brand.
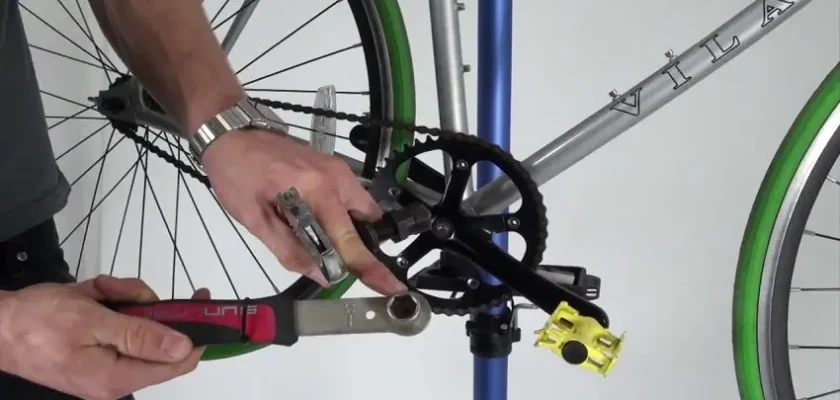
- After taking care of chainings and dust cap, loosen the hex bolt or pinch bolt from the crank arm. The crank adjustment differs from bike to bike. That means, for loosening the crank you have to start from either the left (non-drive) or right side (drive-side) crank. It depends on which side of the crank arm is attached to the bottom bracket.
- In my case, it is the right arm or drive-side. A 4mm or 4mm Allen key will do the job for me here. Make sure to use an Allen key with a decent size. Use a large socket if it’s hard to pull off the crank arm.
- Now it’s time to pull off the left crank arm. You might need a soft rubber mallet to pull off the axle. It depends on how long the axle is in the bottom bracket. Or, maybe a gentle push is enough to do this job.
Clean The Bottom Bracket Socket:
After sliding off the crank, it is the best thing to use some rubbing alcohol into the socket. It will help to reduce your maintenance cost and longevity of the new crankset.
Best Crankset For Mountain Bikes
Re-Install and Assembling of a New Crankset:
Before sliding on the new crank arm in the bottom bracket, use a thin film of grease on the interface. Now push the left crank arm into the socket, a gentle push is required to complete the process.
- After installing the crank arm, check the other side. If there are any washers left, put them back again. You can use a small amount of grease on the surface of the washer.
- Follow the reverse steps to reinstall and assemble the crankset- re-tighten the pinch bolt and put the dust cap on.
- To complete the re-tightening process on the other side, use a torque wrench. A sweet click sound will make you confirm the right tightening. How much pressure you should put on?- well, generally it is 15 N-m. But don’t stick on numbers, please. You will know it on your own. And, the manufacturer already mentioned it on paper.
- The last job to complete the reinstall process is- moving the chain back onto the chainrings.
Note Down Few Things:
- Crankset differ from bike to bike
- The crank arms may find on the left or right side (depending on the manufacturer)
- The main thing is to pull off the crank axle from the bottom socket
- When you use a rubber mallet to push out the crank handle, make sure that hammering doesn’t cause damage to the bottom bracket socket.
- You will find the paddles (Left or Right) indication name at the end of each arm.
How Do You Know About The Correct Installation?
After putting back gear, and chain on the chainrings, go for a test drive. If you feel the chain tension good (not feel tight or loose), and there is no creaky sound- then it is good to go.
Are All The Crank Removal Tools Universal?
No. It depends upon your crank system and the bike type. But the type of tools that I have mentioned earlier are common and required to replace your crankset.
Last Words
The cranks are different from bike to bike, but the Principal is the same. In terms of replacing and installing your mountain bike crankset, you need to know about your bike crank system. It is not hard to do the maintenance of the bike at home. Furthermore, it is easy to do the job correctly with the right crank removal kits. Just do the removal process with a focused mind, and then you will do the right installation of your MTB crank easily.