
Whether you’re a seasoned cyclist or just starting out, understanding how to maintain and replace your brake pads is essential for a safe and enjoyable riding experience.
Brake pads are a crucial component of your bike’s braking system, responsible for stopping your bike efficiently and reliably. Over time, they can become worn down and lose their effectiveness. But fear not! With a few simple tools and a little know-how, you can replace your hope brake pads and get back on the road in no time.
So, let’s get started on this exciting journey of learning how to change hope brake pads and ensure your cycling adventures are smooth and worry-free.
Changing Hope Brake Pads: A Step-By-Step Guide
If you own a bike equipped with Hope brakes, knowing how to change the brake pads is essential for maintaining optimal performance and ensuring your safety on the road or trails. Although it may seem intimidating at first, replacing the brake pads on Hope brakes is a straightforward process that you can easily master with a few simple tools and some patience.
What You Will Need
Before getting started, gather the following tools and materials:
- New brake pads compatible with your Hope brakes
- A set of Allen wrenches
- Rubbing alcohol or brake cleaner
- Clean, lint-free cloth
- Safety glasses
- Disposable gloves (optional)
Step 1: Ensure Your Safety
Before diving into the brake pad replacement, take a moment to put on your safety glasses. Although it may seem unnecessary, this simple step can protect your eyes from any debris that might be dislodged during the process.
Step 2: Remove the Wheel
To gain access to the brake caliper, you need to remove the wheel. Start by releasing the brake lever to create more room for the pads to be removed easily.
Step 3: Remove the Retaining Clip
Locate the retaining clip securing the brake pads. Depending on the model, you might find one or two retaining clips holding the pads in place. Use your Allen wrench to remove the screw(s) on the retaining clip and carefully take it out.
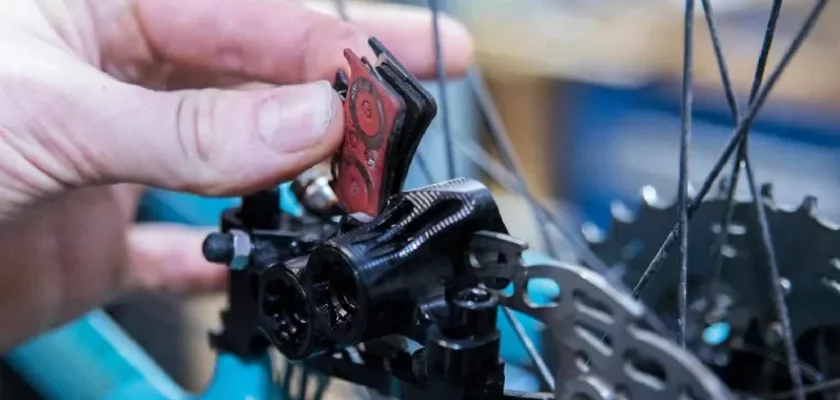
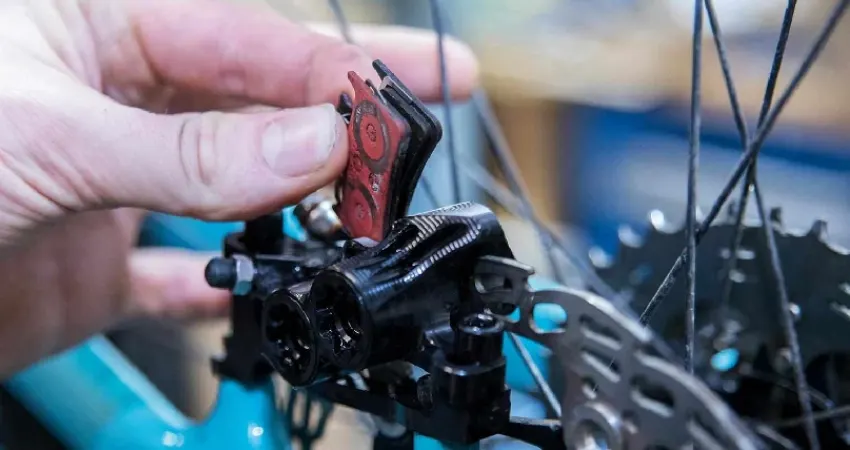
Step 4: Remove the Brake Pads
After removing the retaining clip(s), you can now slide the brake pads out of their housing. Depending on your brake model, you might have to pull them out at an angle or straight back.
Step 5: Clean the Caliper and Pistons
With the old brake pads removed, take this opportunity to clean the brake caliper and pistons. Using a lint-free cloth soaked in rubbing alcohol or brake cleaner, gently wipe away any dirt, dust, or residue that may have accumulated. Ensure that the pistons are clean and move smoothly in their housing.
Step 6: Install the New Brake Pads
Before installing the new brake pads, it’s crucial to check if they are compatible with your Hope brakes. Consult the manufacturer’s instructions or website to ensure you have the correct model and type.
Follow these steps to install the new brake pads:
- Take one of the new brake pads and slide it into the caliper until it’s fully seated. Ensure that the pad’s face with the friction material is facing the rotor.
- Repeat the same process for the second brake pad, making sure it’s correctly aligned and fully seated.
Step 7: Reinstall the Retaining Clip
Now that the new brake pads are in place, reattach the retaining clip(s) to secure them. Insert the screw(s) and tighten them with your Allen wrench, ensuring that the clip is securely fastened.
Step 8: Check Brake Alignment
Before reattaching the wheel, check the brake alignment to ensure optimal braking performance. Look through the caliper, aligning the pads with the rotor. There should be an equal gap between each pad and the rotor on both sides.
If the brake pads are not aligned correctly, you can adjust them using the barrel adjuster or by adding or removing washers behind the caliper mount. Make small adjustments and test the alignment frequently until the pads are evenly spaced on both sides of the rotor.
Step 9: Reinstall the Wheel
Once you are satisfied with the brake pad alignment, carefully place the wheel back onto the bike. Reattach the quick-release skewer or axle nuts and ensure that the wheel is securely fastened.
Step 10: Test the Brakes
After completing the brake pad replacement, take a moment to test the brakes before hitting the road or trails. Squeeze the brake lever a few times to ensure that the pads make proper contact with the rotor and that the stopping power is sufficient.
If you notice any issues, such as poor braking performance or excessive noise, double-check the brake pad alignment or consult a professional bike mechanic for further assistance.
Maintaining Your Hope Brake Pads
To ensure your Hope brake pads last as long as possible and deliver optimal performance, consider the following maintenance tips:
- Regularly inspect your brake pads for wear and replace them when necessary.
- Keep your brake caliper clean and free from dust, dirt, or debris.
- Avoid contaminating the brake pads with oil, grease, or any cleaning agents not recommended by the manufacturer.
- Always store and transport your bike in a secure and upright position to prevent damage to the brake pads.
Remember, when in doubt, don’t hesitate to seek professional help or consult the manufacturer’s guidelines for your specific model of Hope brakes. By following these instructions and maintaining your brake pads regularly, you can ensure smooth, reliable braking performance on every ride.
Frequently Asked Questions
1. How do I remove the old Hope brake pads?
To remove the old Hope brake pads, first, loosen the retaining bolt using a 5mm Allen key. Then, slide the pads out of the caliper by pulling them towards the center of the rotor.
2. Can I reuse the old brake pads during this process?
No, it is not recommended to reuse old brake pads. It is best to replace them with new ones to ensure optimal braking performance and safety.
3. What is the proper way to install new Hope brake pads?
To install new Hope brake pads, start by applying a small amount of copper grease to the backplate. Then, slide the pads into the caliper, making sure they are properly aligned with the rotor. Finally, tighten the retaining bolt securely.
4. How often should I change my Hope brake pads?
The frequency of brake pad replacement may vary depending on usage and conditions. However, as a general guideline, it is recommended to inspect the brake pads regularly, and replace them when the friction material reaches a thickness of around 3mm.
5. Are there any specific tools required to change Hope brake pads?
To change Hope brake pads, you will typically need a 5mm Allen key to remove the retaining bolt. Additionally, having a small amount of copper grease can be helpful during installation to reduce noise and vibration.
Final Thoughts
In conclusion, changing Hope brake pads is a straightforward process that can improve the performance and safety of your bike. By following the step-by-step guide mentioned in this article, you can confidently replace your brake pads without any professional assistance.
Remember, safety should be your utmost priority, so always ensure that you have the necessary tools and knowledge before starting the process. With a little patience and careful execution, you’ll be able to enjoy smooth and efficient braking on your bike. So, if you’re wondering how to change Hope brake pads, just refer back to this article and get ready to take on the task with confidence.