
No more struggling with slippery or torn grips that hinder your control and enjoyment on the bike. By following our simple steps, you’ll be able to easily replace your BMX grips in no time. Whether you’re a beginner rider or a seasoned pro, this guide will help you achieve the perfect grip upgrade for your BMX bike.
So if you’re ready to enhance your biking experience and learn how to change BMX grips, keep reading for a step-by-step tutorial that will have you back on the bike with confidence and improved control. Let’s dive in!
How to Replace BMX Grips: A Step-By-Step Guide
Changing the grips on your BMX bike can be a simple and satisfying DIY project. Whether your old grips are worn out or you simply want to upgrade to a new style, this guide will take you through the process of changing your BMX grips. By following these steps, you’ll have your bike feeling fresh and ready to ride in no time.
Step 1: Gather the Necessary Tools
Before you begin changing your BMX grips, it’s essential to have the right tools at hand. Here’s what you’ll need:
- New BMX grips (make sure they are compatible with your handlebars)
- Rubbing alcohol or grip solvent
- Clean cloth
- Razor blade or utility knife
- Grip glue or hairspray
- Compressed air (optional)
Step 2: Remove the Old Grips
To install new grips, you first need to remove the old ones. Follow these steps:
- Use a razor blade or utility knife to carefully cut through the old grips from one end to the other.
- Apply a small amount of rubbing alcohol or grip solvent between the grip and handlebar to help loosen the adhesive.
- Twist and pull the grips off the handlebars. If they are stubborn, you can try using compressed air to inflate them slightly and make removal easier.
Step 3: Clean the Handlebars
Now that you’ve removed the old grips, it’s time to clean the handlebars to ensure a proper grip installation. Follow these steps:
- Dip a clean cloth in rubbing alcohol and wipe down the handlebars thoroughly.
- Remove any remaining adhesive or residue left behind by the old grips.
- Use a razor blade or utility knife to gently scrape off any stubborn residue. Be careful not to damage the handlebars in the process.
Step 4: Prepare the New Grips
Before installing the new grips, it’s important to prepare them for a secure and long-lasting fit. Here’s what you need to do:
- Apply a small amount of grip glue or hairspray to the inside of each grip. This will create a strong bond between the grip and handlebar.
- Spread the adhesive evenly throughout the inside of the grip using your fingers or a clean cloth.
- Let the adhesive sit for a minute or two to become tacky. This will make the installation process easier.
Step 5: Install the New Grips
Now it’s time to put those fresh grips on your BMX bike. Follow these steps for a successful installation:
- Align the new grip with the handlebar, making sure it is positioned correctly.
- With one hand on the grip, use your other hand to push the grip onto the handlebar, applying firm and even pressure.
- Continue pushing the grip onto the handlebar until it is fully seated in place.
- To ensure a secure fit, give the grip a few twists while pushing it onto the handlebar. This helps evenly distribute the adhesive and prevents any slippage.
Step 6: Allow the Grips to Set
Once the new grips are installed, it’s important to let them set properly. This will ensure a strong bond between the grip and handlebar. Follow these steps:
- Allow the grips to dry and set for at least 24 hours before riding your BMX bike.
- Avoid putting excessive force on the grips during this time to prevent any movement or slippage.
Tips and Tricks for Changing BMX Grips
Here are some additional tips to help make the grip-changing process even smoother:
- If you encounter difficulty removing old grips, try spraying some compressed air between the grip and handlebar. This will create a small gap, making it easier to loosen the grip for removal.
- Grips that have a lock-on mechanism can be an easier option for riders who frequently change their grips. These grips have built-in clamps that secure them onto the handlebars without the need for adhesive.
- If you prefer a softer feel or a more secure grip, consider using grip tape underneath your grips. This added layer can provide extra cushioning and grip.
- Regularly inspect your grips for signs of wear and tear. Over time, grips can become worn and lose their effectiveness. Replace them as needed to maintain optimal control and comfort while riding.
Changing your BMX grips is a straightforward process that can easily be done at home with minimal tools. By following these step-by-step instructions, you’ll be able to keep your grips fresh and improve your riding experience. Remember to always prioritize safety and carefully inspect your grips to maintain control and comfort during your BMX adventures.
Frequently Asked Questions
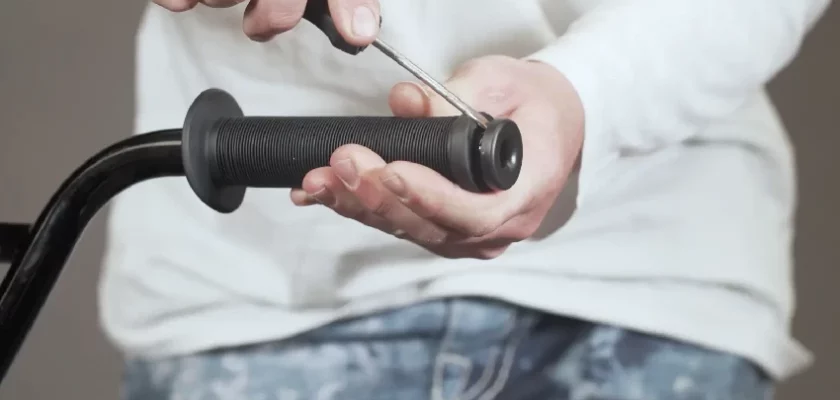
1. How do I remove old BMX grips?
To remove old BMX grips, use a flathead screwdriver or compressed air to loosen the grip from the handlebar. Once loose, twist or slide the grip off while pulling it away from the handlebar.
2. What tools do I need to change BMX grips?
To change BMX grips, you will need a flathead screwdriver or compressed air to remove the old grips, and a new set of BMX grips. Optionally, you can use grip glue or hairspray for extra grip security.
3. How do I install new BMX grips?
To install new BMX grips, first, remove the old grips using a flathead screwdriver or compressed air. Then, apply grip glue or hairspray to the handlebar and slide the new grip onto it, ensuring it is secure and aligned properly.
4. Can I reuse old BMX grips?
It is generally not recommended to reuse old BMX grips. Over time, grips can wear out and lose their grip qualities, affecting the overall control and comfort while riding. It is best to invest in a new pair of grips for optimum performance.
5. What are the benefits of changing BMX grips?
Changing BMX grips regularly helps maintain a secure grip while riding, enhancing control and confidence. It also improves comfort by providing a fresh and clean surface to hold on to, reducing hand fatigue and improving the overall riding experience.
Final Thoughts
To conclude, changing BMX grips is a simple yet important task that every rider should know how to do. By following the step-by-step guide provided in this article, you can easily remove and install new grips to enhance your grip and control on the bike. Remember to use a few drops of rubbing alcohol or hairspray to make the installation process smoother.
Taking care of your grips is crucial for a comfortable and safe riding experience. Whether you’re a professional or a beginner, knowing how to change BMX grips is a valuable skill that will ensure you have the best possible grip on your handlebars. So, grab your tools and get ready to enjoy a fresh set of grips on your BMX bike. Ride on!