
If you’re wondering how to change an Ultegra chainring, you’ve come to the right place. In this blog article, we will guide you through the process step by step, ensuring a smooth and precise installation.
Changing the Ultegra chainring might seem like a daunting task, but with the correct knowledge and tools, it can be relatively straightforward. Whether you’re a seasoned cyclist or a beginner, understanding how to replace your chainring can make a significant difference in your riding experience.
So, let’s dive in and discover the essential steps on how to change an Ultegra chainring, ensuring your bike operates at its peak performance.
Easy Steps: Changing Ultegra Chainring
Changing the chainring on your Ultegra bike can improve your cycling performance and enhance your overall riding experience.
Materials You Will Need:
Before you get started, make sure you have the necessary tools and materials:
- New Ultegra chainring: Ensure you have the appropriate size and type for your bike model and crankset.
- Allen wrench set: You will need various sizes to loosen and tighten bolts.
- Chainring bolts: If your new chainring doesn’t come with bolts, make sure to get the correct ones.
- Chainring nut wrench: Some cranksets require a specific tool to hold the nuts while you tighten the bolts.
- Chainring bolt tool: A specialized tool can make installing the bolts easier, but it’s not essential.
Step 1: Prepare Your Bike
Before diving into the chainring replacement process, take a few minutes to prepare your bike:
- Clean the crankset area: Remove any dirt, debris, or grease from the crankset, chainrings, and bolts. This will make it easier to work and ensure a tighter fit for the new chainring.
- Shift to the smallest chainring: Make sure your bike is in the smallest front chainring and the smallest rear cog. This will relieve tension on the chain, making it easier to remove the chainring.
Step 2: Remove the Old Chainring
Now that your bike is ready, follow these steps to remove the old chainring:
- Identify the chainring bolts: You’ll typically find five or sometimes four bolts securing the chainring to the crankset. These are usually located on the inside of the chainring and attach it to the crankarms.
- Loosen the chainring bolts: Using the appropriate-sized Allen wrench, gradually loosen each chainring bolt by turning counterclockwise. Start with one bolt and work your way around in a star pattern. Avoid fully removing the bolts until they are all loosened.
- Remove the old chainring: Once all the bolts are sufficiently loosened, carefully lift the old chainring off the crankset. Pay attention to any spacers or washers between the chainring and crankset – you’ll need to transfer them to the new chainring if necessary.
Step 3: Install the New Chainring
With the old chainring removed, it’s time to install the new one:
- Check compatibility: Ensure that the new Ultegra chainring is the correct size and type for your crankset and bike model. Refer to the manufacturer’s guidelines or consult with a bike mechanic if you’re uncertain.
- Align the chainring: Take note of the orientation of the chainring teeth. They should be facing in the correct direction: the teeth should point towards the rear wheel.
- Transfer spacers or washers: If your old chainring had any spacers or washers, transfer them to the corresponding places on the new chainring.
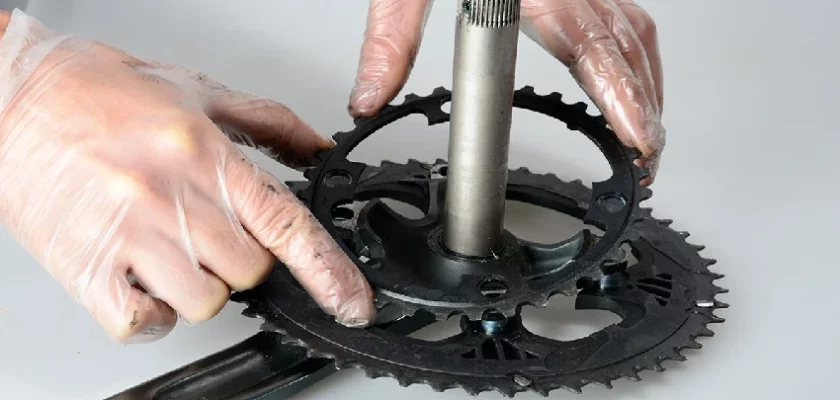
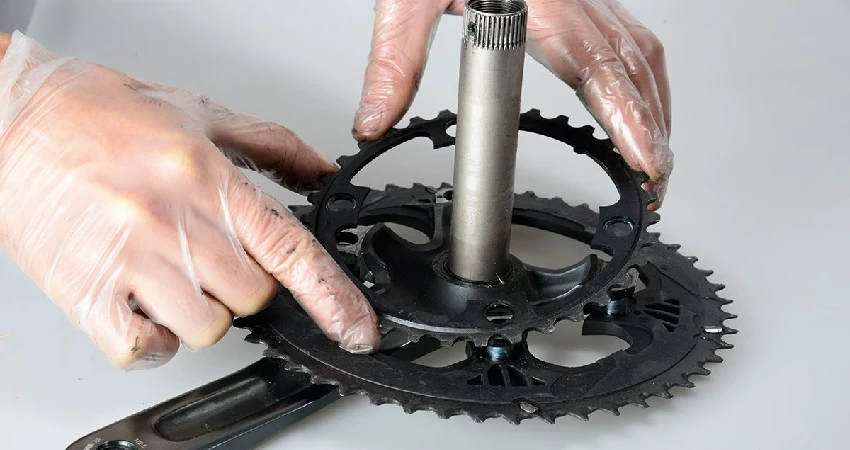
- Place the new chainring: Carefully align the new chainring with the bolt holes on the crankset. Ensure it fits snugly and that the bolt holes align properly with the crankarms.
- Install the chainring bolts: Starting with one bolt, hand-tighten it clockwise until snug. Repeat this for each bolt, gradually tightening them in a star pattern until they are all snug.
- Torque the bolts: Using a torque wrench (if available) or an Allen wrench, tighten each chainring bolt to the manufacturer’s recommended torque specifications. This is typically around 12-14 Newton meters (Nm), but refer to the specific instructions provided with your chainring.
- Double-check the installation: Ensure the chainring is securely fastened, and give it a gentle tug to confirm it doesn’t move or feel loose.
Step 4: Test and Adjust
Now that the new chainring is installed, it’s crucial to test it and make any necessary adjustments:
- Inspect the chainring: Double-check the alignment of the chainring teeth and ensure they are engaging smoothly with the chain.
- Test shifting: Shift through your gears to verify that the chain moves cleanly between the chainrings and cogs. If you notice any issues, such as chain skipping or difficulty shifting, adjustments may be necessary.
- Fine-tune front derailleur: If the shifting isn’t smooth, you may need to adjust the front derailleur to align with the new chainring. Consult your bike’s manual or seek professional assistance for this step.
- Test ride: Take your bike for a short test ride to ensure everything is working properly. Pay attention to any unusual noises or performance issues, and address them promptly.
Frequently Asked Questions
1. What tools do I need to change my Ultegra chainring?
To change your Ultegra chainring, you will need a 5mm Allen wrench, a chainring bolt tool, and a torque wrench for proper installation.
2. How do I remove the old Ultegra chainring?
First, shift the chain onto the inner chainring. Then, use the 5mm Allen wrench to remove the chainring bolts. Carefully slide off the old chainring and set it aside.
3. How do I install the new Ultegra chainring?
Align the new chainring with the crank arm and secure it using the chainring bolts. Tighten them evenly and ensure they are torqued to the manufacturer’s specifications using a torque wrench.
4. Do I need to replace the chain when changing the Ultegra chainring?
It is recommended to inspect the chain for wear when changing the chainring. If the chain is worn or doesn’t mesh properly with the new chainring teeth, it should be replaced to ensure smooth and efficient shifting.
5. How often should I change my Ultegra chainring?
The frequency of chainring replacement depends on factors such as mileage, riding conditions, and maintenance. Regularly inspect your chainring and look for signs of wear, such as shark fin-shaped teeth or excessive chain skipping. Replace as needed to maintain optimal performance.
Final Thoughts
In conclusion, changing the Ultegra chainring is a straightforward process that can enhance the performance and lifespan of your bike. By following a few simple steps, you can easily remove the old chainring and install a new one. Start by gathering the necessary tools and carefully loosening the bolts that secure the chainring.
Once the old chainring is removed, align the new one properly and tighten the bolts securely. Ensure the chain is properly seated and test the bike before riding. With this easy guide on how to change Ultegra chainring, you can maintain a smooth and efficient cycling experience.