
Do you find it frustrating when your bike fails to shift smoothly or accurately? Well, worry no more! In this blog article, we will discuss how to change road bike shifters and provide you with a step-by-step guide to make the process easy and hassle-free.
Changing road bike shifters might seem like a daunting task, especially if you’re not familiar with bike mechanics. But fear not, we’ve got you covered. Whether you’re a seasoned cyclist or just starting out, our comprehensive guide will help you navigate through the process with ease.
So, if you’re ready to enhance your riding experience and ensure precise shifting every time, let’s dive right in and explore how to change road bike shifters.
Road Bike Shifter Swap: A Step-By-Step Guide
Over time, you might find the need to replace your road bike shifters due to wear and tear, upgrading to a better model, or simply personal preference.
Tools You Will Need
Before we dive into the nitty-gritty of replacing your road bike shifters, make sure you have the following tools ready:
- Allen wrench set
- Cable cutters or bike-specific cable cutters
- Screwdrivers (both flathead and Phillips)
- Electric tape or zip ties
- Grease or lubricant
- Replacement shifters (compatible with your bike’s drivetrain)
Step 1: Prepare your bike
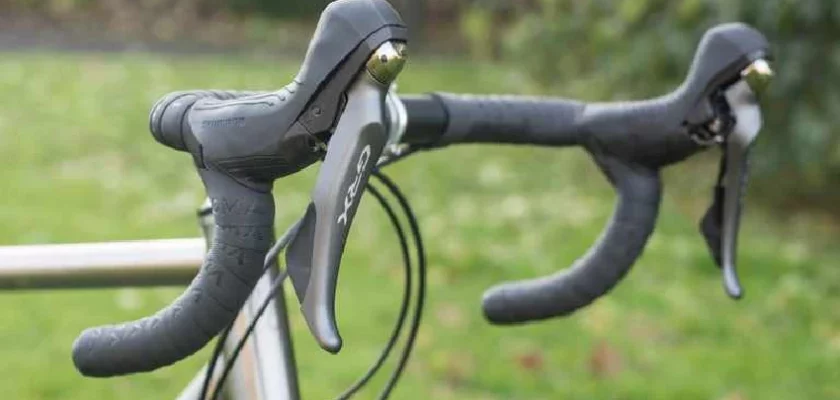
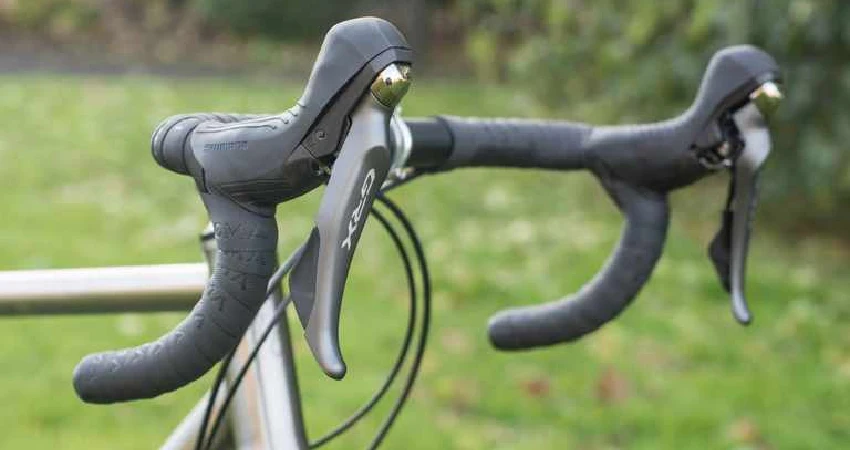
To begin, find a clean and open workspace where you can comfortably work on your road bike. Make sure you have enough clearance to maneuver and access all the necessary parts without any hindrances. Keep in mind that road bike shifters are integrated with brake levers, so you will be dealing with both shifters and brake systems.
Next, shift your bike onto the smallest chainring and smallest rear cog. This will relieve tension on the shift cables, making it easier to detach them from the old shifters later on.
Step 2: Remove the handlebar tape
Since you’ll be replacing your road bike shifters, you need to remove the handlebar tape for access. Start from the edge of the tape, either at the handlebar ends or at the shifters. Carefully peel it off, taking care not to tear it as you may want to reuse it later. Once the tape is removed, set it aside in a safe and clean place.
Step 3: Remove the old shifters
Now that you have access to the shifters, it’s time to remove the old ones. The process may vary slightly depending on the specific model and brand of your shifters, but the general steps remain the same.
- Locate the bolts on the side or underneath the brake hood. These bolts secure the shifters to the handlebars. Use the appropriate size Allen wrench or screwdriver to loosen and remove them.
- Once the bolts are removed, carefully slide the old shifters out from under the handlebar tape. Pay attention to any wires or cables attached to the shifters.
- If your road bike shifters have integrated brake and shift cables, you’ll have to detach the cables from the derailleurs. Use cable cutters to cut the metal end caps off the cables and release them from the derailleurs. Make sure to remember or mark which cable goes to which derailleur.
Step 4: Install the new shifters
Now that you have successfully removed the old shifters, let’s move on to installing the new ones. Before proceeding, refer to the shifter’s product manual to ensure you are following the manufacturer’s instructions properly. Here’s a general outline of the installation process:
- Start by sliding the new shifters into the handlebars from underneath the bar tape. Ensure they are aligned correctly and oriented according to your preferred position for easy access.
- Once the shifters are in place, loosely tighten the bolts to hold them in position temporarily. This will allow adjustments later if needed.
- If your new shifters have integrated brake and shift cables, thread the cables through the appropriate channels or ports on the shifters. Follow the cable routing marked on the shifters or consult the manual for guidance.
- Reattach the cables to the derailleurs, making sure the correct cable goes to the correct derailleur. Secure the cables using the appropriate tension, ensuring they are neither too loose nor too tight.
- Tighten the bolts securing the shifters to the handlebars firmly. Double-check the positioning and ensure there are no loose parts or misalignments.
Step 5: Adjust the shifting system
With the new shifters installed, it’s important to fine-tune your shifting system to ensure smooth and accurate gear changes. Follow these steps to make the necessary adjustments:
- Check the cable tensions: With your road bike on a bike stand or flipped upside down, shift through all gears to evaluate the shifting performance. If you notice any sluggishness or hesitations, you may need to adjust the cable tensions.
- Fine-tune the indexing: Using the barrel adjusters located on the derailleur or shifters, adjust the indexing to eliminate any chain rub or misalignment during gear changes. Make small adjustments clockwise or counterclockwise until the shifting is smooth and precise.
- Test and retest: After making adjustments, take your road bike for a short test ride to verify the shifting system’s functionality. Pay attention to any skipping or excessive noise during gear changes. Repeat the adjustment process if necessary.
- Complete the setup: Once you are satisfied with the shifting performance, cut off any excess cable length if needed, leaving enough room for future adjustments. Secure the cable ends with cable end caps using either electric tape or zip ties.
- Reinstall the handlebar tape: If you removed the handlebar tape earlier, now is the time to reinstall it. Start from the edge and carefully wrap it back onto the handlebars. Make sure it is snug and properly aligned.
Step 6: Final checks and maintenance
Before hitting the road, perform a final set of checks to ensure everything is in order:
- Test the brakes: Confirm that the brake lever action is smooth and the braking power is consistent. Adjust the brake calipers if necessary.
- Verify the shifters: Shift through all gears again to ensure the indexing and cable tensions are still correct post-adjustment.
- Lubricate moving parts: Apply a small amount of lubricant or grease to the moving parts of the shifters, such as the pivot points. This will enhance their performance and prevent unnecessary wear.
- Clean up: Take a moment to clean your road bike, removing any grease or dirt that accumulated during the shifter replacement process.
Congratulations! You have successfully changed the shifters on your road bike.
Frequently Asked Questions
1. How do I choose the right road bike shifters?
Consider your riding style and budget. Look for shifters that are compatible with your drivetrain and make sure they have a comfortable grip and responsive shifting.
2. What tools do I need to change road bike shifters?
You typically need Allen wrenches, cable cutters, a cable puller, and a flathead screwdriver to replace road bike shifters.
3. Can I change the shifters on my road bike myself?
Yes, with the right tools and some basic mechanical knowledge, you can change the shifters on your road bike. However, if you are unsure or uncomfortable, it’s best to consult a professional mechanic.
4. How do I remove the old shifters from my road bike?
Start by loosening the clamp or bolt that holds the shifter in place. Then, disconnect the cables and remove any tape or grip covering the handlebar. Finally, slide off the old shifters and clean the area if needed.
5. How do I install the new road bike shifters?
Position the new shifters on the handlebar and tighten the clamp or bolt securely. Connect the cables and adjust the tension for smooth shifting. Double-check that everything is properly aligned and test the gears before riding.
Final Thoughts
To conclude, changing road bike shifters is a straightforward process that can greatly improve the performance and functionality of your bike. By following the steps outlined in this article, you can easily upgrade or replace your shifters to suit your preferences and needs.
Remember to carefully select the right shifters for your bike and ensure they are compatible with your drivetrain components.
Overall, the process involves removing the old shifters, installing the new ones, and adjusting them for optimal shifting. It is important to take your time and follow the instructions provided by the manufacturer to ensure a successful installation. With a little patience and some basic tools, you can confidently change road bike shifters and enjoy a smoother and more efficient riding experience.