Are you tired of your old, worn-out bike seat? Do you dream of having a vibrant, eye-catching seat that reflects your personality? Well, look no further because in this article, we will show you exactly how to paint a bike seat. Whether you’re a biking enthusiast or just someone in need of a fun DIY project, this guide is for you.
Painting a bike seat may seem like a daunting task, but with the right materials and techniques, it can be a simple and rewarding endeavor. By following our step-by-step instructions, you’ll be able to transform your dull seat into a masterpiece that will turn heads wherever you go.
So, if you’re ready to add a splash of color and creativity to your bike, let’s dive right in and learn how to paint a bike seat!
Paint A Bike Seat: Transform Your Ride with a Fresh Look

A newly painted seat not only adds a personal touch to your bike but also protects it from wear and tear.
Gather the Necessary Materials
Before you start painting, it’s essential to gather all the necessary materials. Here’s a list of items you’ll need:
Sandpaper (medium and fine-grit)
Painter’s tape
Primer
Spray paint or paint suitable for vinyl or leather
Clear coat spray
Clean cloth or rag
Mild soap or detergent
Water
Step 1: Prepare the Bike Seat
Preparing the bike seat properly is crucial to achieve a smooth and long-lasting paint finish. Follow these steps to ensure your seat is ready for painting:
1. Remove the bike seat: Use a wrench or Allen wrench to loosen the bolts securing the seat to the bike. Carefully lift the seat off the bike and set it aside in a well-ventilated workspace.
2. Clean the seat: Mix mild soap or detergent with water in a bucket. Dip a clean cloth or rag into the soapy water and gently wipe the seat to remove any dirt, grease, or grime. Make sure to clean both the top and bottom surfaces of the seat. Rinse with clean water and let it dry completely.
3. Sand the seat: Use medium-grit sandpaper to lightly sand the seat’s surface. This step helps the paint adhere better. Pay attention to rough spots, scratches, or imperfections, and sand them until the seat feels smooth to the touch. Switch to fine-grit sandpaper for a final sanding, ensuring a perfectly smooth surface.
Step 2: Apply Primer
Priming the bike seat is essential to create a strong bond between the paint and the seat material. Follow these steps to apply the primer:
1. Protect the bike seat: Use painter’s tape to cover any areas you don’t want to paint, such as logos or decorative elements on the seat.
2. Apply the primer: Shake the primer can well before using. Hold the can at a distance of about 6 to 8 inches from the seat and spray a thin, even coat of primer. Start with the bottom of the seat and work your way up to the top, ensuring full coverage. Let the primer dry according to the manufacturer’s instructions.
3. Sand the primer: Once the primer is dry, lightly sand the seat again with fine-grit sandpaper. This will help smooth out any imperfections and create a more even surface for the paint.
Step 3: Paint the Bike Seat
Now comes the exciting part – painting your bike seat! Follow these steps to achieve a professional-looking finish:
1. Choose the paint: Select a spray paint specifically designed for vinyl or leather surfaces. Alternatively, you can use brush-on paint suitable for these materials. Ensure that the paint you choose is compatible with your bike seat material.
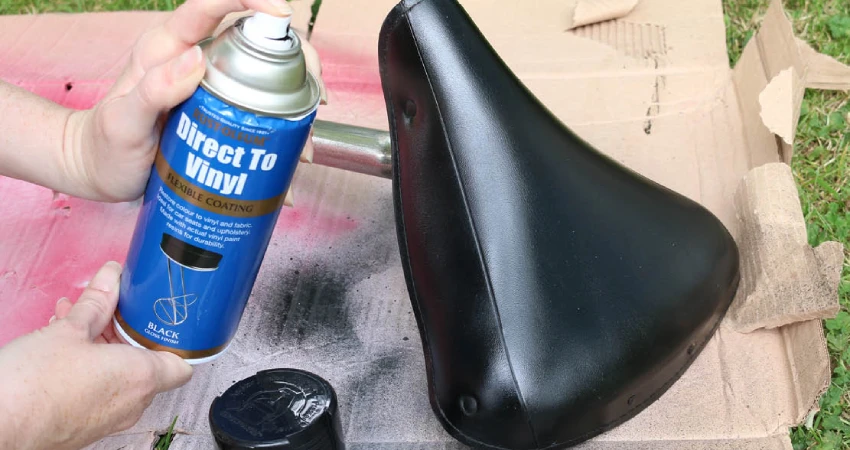
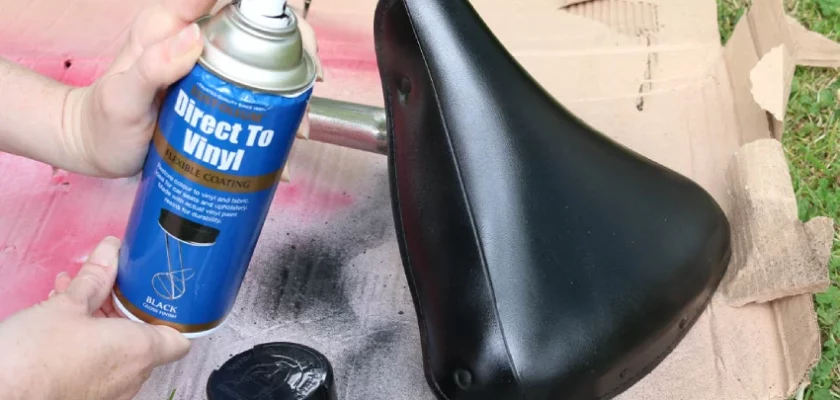
2. Apply the paint: Shake the paint can well before using. Hold the can at a distance of about 6 to 8 inches from the seat and apply a thin, even layer of paint. Start with the bottom of the seat, working your way up.
Avoid spraying too much paint at once to prevent drips or uneven coverage. Let the first coat dry completely before applying additional coats (if needed). Follow the manufacturer’s instructions for drying time between coats.
3. Sand between coats: For a smoother finish, lightly sand the painted surface between each coat using fine-grit sandpaper. This step helps remove any imperfections and increases the paint’s adherence. Wipe away any sanding residue with a clean cloth before applying the next coat.
4. Apply additional coats (if necessary): Depending on the desired color intensity and coverage, you may need to apply two or three coats of paint. Always allow each coat to dry fully before applying the next one. Take your time and be patient, as rushing this step can result in an uneven or streaky finish.
Step 4: Protect with Clear Coat
To protect your newly painted bike seat and enhance its durability, it’s important to apply a clear coat. The clear coat acts as a barrier against scratches and UV rays. Follow these steps to apply the clear coat:
1. Choose the clear coat spray: Look for a clear coat spray specifically formulated for vinyl or leather surfaces. Ensure it is compatible with the paint you used.
2. Apply the clear coat: Shake the clear coat can well before using. Hold it at a distance of 6 to 8 inches from the seat and apply a light, even coat. Start with the bottom of the seat and work your way up. Allow the clear coat to dry completely between coats, following the manufacturer’s instructions.
3. Add additional coats (optional): If desired, you can apply a second or third coat of clear coat for added protection. Be sure to let each coat dry fully before applying the next one.
Step 5: Reinstall the Bike Seat
Once the clear coat is dry, it’s time to reinstall the bike seat. Follow these steps to secure the seat back onto your bike:
1. Align the seat: Position the seat correctly on the bike frame, aligning it with the center and adjusting it to your preferred height and angle. Ensure it is securely seated in the clamp or attachment mechanism.
2. Tighten the bolts: Use a wrench or Allen wrench to tighten the bolts that secure the seat to the bike frame. Make sure they are tightened securely but do not over-tighten, as this can damage the seat or frame.
Enjoy Your Newly Painted Bike Seat!
Congratulations! You’ve successfully transformed your bike seat with a fresh coat of paint. Now you can enjoy riding in style with a personalized touch.
Remember to take proper care of your newly painted seat by avoiding harsh cleaners or abrasive materials when cleaning. With regular maintenance, your painted bike seat will continue to look great for many rides to come.
Frequently Asked Questions
1. What materials do I need to paint a bike seat?
You will need sandpaper, primer, spray paint, masking tape, a clean cloth, and a clear topcoat sealant.
2. How do I prepare the bike seat for painting?
Start by sanding the seat to remove any existing paint or imperfections. Then, clean the seat with a cloth to remove any dust or debris.
3. Can I paint a bike seat without removing it from the bike?
Yes, you can paint the seat while it’s still attached to the bike. Just make sure to cover up any areas you don’t want to be painted with masking tape.
4. What is the best technique for painting the bike seat?
Hold the spray paint can about 6-8 inches away from the seat’s surface and spray using smooth, even strokes. Start with a thin layer of primer, followed by several thin coats of color, allowing each coat to dry before applying the next.
5. How do I protect the freshly painted bike seat?
After the paint has dried completely, apply a clear topcoat sealant to protect the finish from scratches and fading. It’s important to follow the manufacturer’s instructions for applying and drying times.
Final Thoughts
In conclusion, painting a bike seat is a great way to revitalize your bike and give it a personal touch. By following the steps outlined in this article, you can achieve a professional-looking finish that not only protects the seat but also adds a pop of color to your ride.
Remember to start by prepping the seat surface, applying several thin coats of paint, and allowing adequate drying time between each coat. Lastly, finish it off with a clear protective coat for added durability.
So, go ahead and give your bike seat a fresh new look with these easy-to-follow instructions on how to paint a bike seat.

