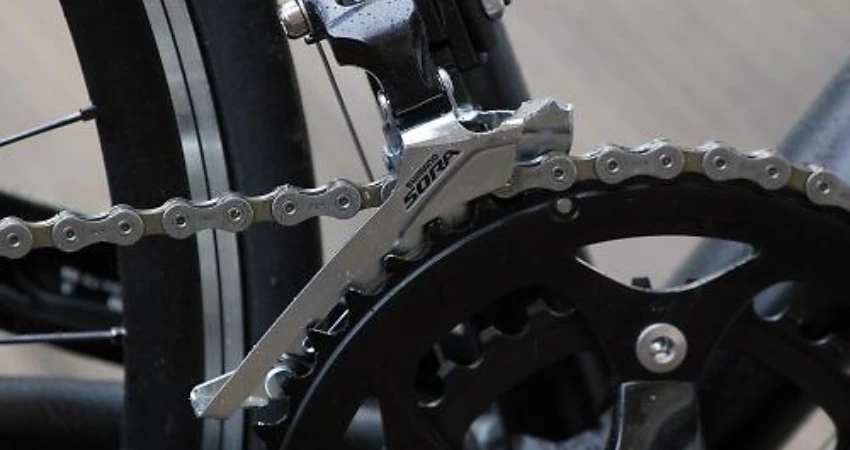
Are you struggling with how to adjust your Shimano Sora front derailleur? Well, you’re in the right place! This blog article will walk you through the steps to get your front derailleur working smoothly and effectively.
The Shimano Sora front derailleur is a critical component of your bike’s shifting system, responsible for moving the chain between the chainrings. When not properly adjusted, shifting can become difficult and imprecise, leading to frustrating rides and potential damage to your drivetrain.
But fear not, with a few simple adjustments, you can have your Shimano Sora front derailleur dialed in and ready to go. So, let’s dive in and explore how to adjust the Shimano Sora front derailleur for optimal performance.
Adjust Shimano Sora Front Derailleur: Easy Guide!

A well-adjusted front derailleur ensures smooth and precise shifting, preventing issues like the chain dropping or getting stuck between gears.
Gather the Tools You Need
Before you begin adjusting your Shimano Sora front derailleur, make sure you have the necessary tools handy. Here’s what you’ll need:
- 5mm Allen wrench
- Phillips head screwdriver
- Torque wrench (recommended, but not essential)
Align the Front Derailleur
The first step in adjusting your Shimano Sora front derailleur is to ensure that it is properly aligned. Start by shifting the rear derailleur to the smallest chainring and the front derailleur to the outermost chainring. This will help you assess the alignment more easily.
- Stand in front of your bike and look at the front derailleur from a straight-on perspective. The outer plate of the derailleur should be parallel to the chainrings. If it’s not, you’ll need to adjust the derailleur’s position.
- Use the 5mm Allen wrench to loosen the clamp bolt on the derailleur, allowing you to move it freely.
- Align the outer plate of the derailleur so that it is parallel to the chainrings. Take your time and make small adjustments until it looks just right.
- Tighten the clamp bolt back up, ensuring that the derailleur remains in its aligned position.
Set the Outer Limit Screw
Now that your front derailleur is properly aligned, it’s time to set the outer limit screw. This screw controls how far the derailleur can move outwards, preventing the chain from overshooting and falling off the chainrings.
- Shift the rear derailleur to the smallest chainring and the front derailleur to the outermost chainring.
- Locate the outer limit screw, which is usually labeled with an “H.” Using the Phillips head screwdriver, turn the screw clockwise until it lightly touches the derailleur.
- Slowly pedal your bike while observing the front derailleur. If the chain is about to fall off or rubs against the derailleur, you will need to adjust the outer limit screw gradually. Turn the screw counterclockwise in small increments until the chain stays on the chainring without rubbing.
- Once the chain is properly positioned on the outer chainring, stop pedaling and ensure that it remains in place. If it does, you have successfully set the outer limit screw.
Adjust the Inner Limit Screw
After setting the outer limit screw, it’s time to tackle the inner limit screw, which controls how far the derailleur can move inwards. This prevents the chain from falling off the small chainring and getting caught between the chainrings and the frame.
- Shift the rear derailleur to the smallest chainring and the front derailleur to the innermost chainring.
- Locate the inner limit screw, typically labeled with an “L.” Use the Phillips head screwdriver to turn the screw clockwise until it lightly touches the derailleur.
- Gently pedal your bike while closely observing the front derailleur. If the chain is rubbing against the derailleur or getting caught between the chainrings and the frame, you will need to adjust the inner limit screw. Turn the screw counterclockwise in small increments until the chain moves smoothly and doesn’t rub.
- Once the chain is smoothly shifting onto the smallest chainring, stop pedaling and ensure that it remains in place. If it does, you have successfully adjusted the inner limit screw.
Tweak the Cable Tension
Now that you have set the limit screws, it’s time to fine-tune the cable tension, which plays a crucial role in accurate shifting between chainrings.
- Shift your bike to the smallest chainring on both the front and rear derailleurs.
- You’ll notice a barrel adjuster on the front derailleur near the shifter cable. Start by turning it counterclockwise to loosen the cable tension slightly.
- Next, shift to the largest chainring on the front derailleur. If the chain doesn’t shift up smoothly, turn the barrel adjuster clockwise in small increments until the shifting becomes crisp and precise.
- Go back to the smallest chainring and ensure that the chain smoothly shifts down as well. If not, make further adjustments to the barrel adjuster until both upshifts and downshifts are smooth.
Fine-Tuning for Perfect Shifting
Now that you’ve adjusted the alignment, limit screws, and cable tension, you’re almost there. To achieve perfect shifting performance, there are a few additional steps you can take:
- Chainline alignment: Check that the front derailleur’s outer plate aligns perfectly with the chainring teeth. You can fine-tune this by slightly adjusting the derailleur’s position.
- Fine adjustments: If you notice any minor shifting issues, use the barrel adjuster to make small tweaks to the cable tension until the shifting is flawless.
- Ride and test: Take your bike for a test ride and shift through all the gears to ensure smooth and precise shifting. If you experience any issues, revisit the previous steps and make further adjustments if necessary.
By following these steps, you should be able to properly adjust your Shimano Sora front derailleur. Remember, it may take a few iterations and minor tweaks to achieve the perfect shifting performance, so don’t get discouraged if it’s not perfect on the first try. With patience and a bit of practice, you’ll be able to keep your bike’s drivetrain running smoothly and enjoy every ride to the fullest!
Frequently Asked Questions
1. Why is my Shimano Sora front derailleur not shifting properly?
A possible cause for improper shifting could be cable tension. Adjust the tension using the barrel adjuster until the chain smoothly moves between the front gears.
2. How do I adjust the limit screws on my Shimano Sora front derailleur?
To adjust the limit screws, use a screwdriver to either limit the inward or outward movement of the derailleur. Properly set the low and high limit screws to prevent the chain from falling off.
3. How do I align my Shimano Sora front derailleur with the chainrings?
Position the derailleur cage parallel to the chainrings by adjusting the position with the front derailleur support bolt. Ensure proper clearance between the derailleur and the largest chainring teeth.
4. How do I ensure smooth shifting on my Shimano Sora front derailleur?
Regularly clean and lubricate the derailleur, ensuring smooth movement. Check for any damaged or worn-out parts, such as the chain or cassette, and replace them as needed.
5. Can I adjust my Shimano Sora front derailleur without professional help?
Yes, you can adjust it yourself by following the proper steps and guidelines. However, if you are not confident in your ability, it is recommended to have a professional mechanic do the adjustment for you.
Final Thoughts
In conclusion, adjusting the Shimano Sora front derailleur is a crucial step in ensuring a smooth and precise shifting experience on your bike. By following the simple steps outlined in this article, you can easily fine-tune the derailleur to optimize its performance.
Remember to start by checking the derailleur’s alignment and setting the limit screws correctly. Then, proceed with adjusting the cable tension until the shifting is seamless. Regular maintenance and periodic adjustments will help maintain the derailleur’s functionality and extend its lifespan.
By mastering the art of adjusting the Shimano Sora front derailleur, you can enhance your cycling experience and enjoy a more efficient and reliable gear shifting system on your bike.

