
Have you ever found yourself struggling with properly adjusting your SRAM X3 rear derailleur? If so, you’ve come to the right place! In this blog article, we’ll delve into the steps and techniques needed to fine-tune your derailleur and ensure your shifting experience is smooth and efficient.
The SRAM X3 rear derailleur is commonly found on entry-level mountain bikes and provides reliable performance for riders of all skill levels. However, like any mechanical component, it requires periodic adjustments to maintain optimal functionality.
So, if you’ve been experiencing shifting issues or your gears seem to be skipping or rubbing, don’t worry – we’ve got you covered!
In this comprehensive guide, you’ll find everything you need to know about how to adjust your SRAM X3 rear derailleur and get back on the trails hassle-free. So let’s dive right in!
Adjust Sram X3 Rear Derailleur: Expert Tips

The SRAM X3 rear derailleur is a vital component of your bike’s drivetrain system. It is responsible for shifting the chain onto different gears of the cassette, allowing you to adjust the resistance and speed while riding. Keeping your rear derailleur properly adjusted is essential for smooth shifting and optimal performance when cycling.
Understanding the SRAM X3 Rear Derailleur
Before diving into the adjustment process, it’s crucial to have a basic understanding of how the SRAM X3 rear derailleur works. Here are a few key points:
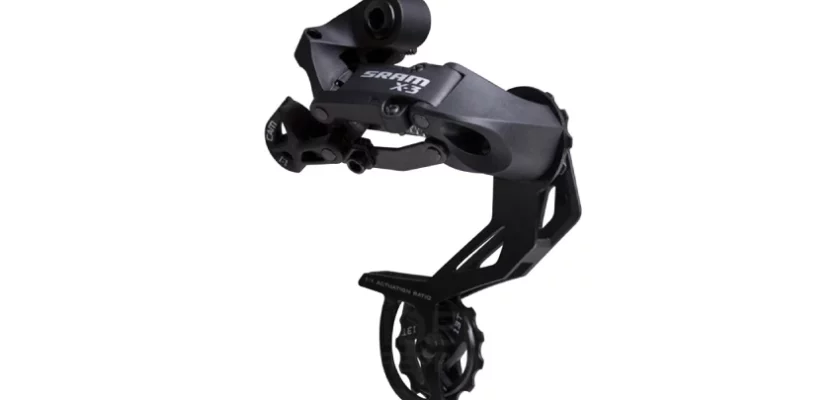
1. Components: The SRAM X3 rear derailleur consists of several components, including the derailleur cage, jockey wheels, spring mechanism, and mounting bolt.
2. Tensioned Spring: The spring mechanism in the rear derailleur creates tension that enables the jockey wheels to move the chain across the different gears.
3. B-Tension Screw: This screw is located on the derailleur body near the derailleur hanger. It allows you to adjust the distance between the jockey wheels and the cogs on the cassette.
Tools Needed
Before starting the adjustment process, gather the following tools:
1. Hex wrenches: You’ll need a hex wrench set compatible with your SRAM X3 derailleur.
2. Phillips head screwdriver: A standard Phillips head screwdriver will be necessary for certain adjustments.
Step-by-Step Adjustment Process
Follow these steps to adjust your SRAM X3 rear derailleur for optimal performance:
Step 1: Inspect the Derailleur Hanger
Start by carefully examining the derailleur hanger, the part where the derailleur attaches to the frame. Ensure it is straight and properly aligned. If the hanger is bent or damaged, it may affect the derailleur’s performance and shifting. In such cases, it’s advisable to seek assistance from a bike mechanic.
Step 2: Shift to the Smallest Rear Cog
Using your shifter, shift the chain onto the smallest rear cog (the one with the highest number of teeth). This position provides the most slack in the derailleur cable, making it easier to perform adjustments.
Step 3: Set the High Limit Screw
The high limit screw determines how far the derailleur can travel towards the inner edge of the smallest cog. Follow these steps to adjust it:
1. Locate the high limit screw on the rear derailleur. It is typically marked with an “H” or “High.”
2. Using a Phillips head screwdriver, turn the high limit screw clockwise to reduce the inward movement of the derailleur or counterclockwise to increase it. The goal is to align the jockey wheel with the smallest cog.
3. Test the adjustment by pedaling and shifting the gears. The chain should move smoothly onto the smallest cog without any noise or rubbing against adjacent cogs. If you hear noise or experience resistance, fine-tune the high limit screw accordingly.
Step 4: Check the Cable Tension
Next, you need to ensure that the cable tension is appropriate for accurate shifting. Here’s what to do:
1. Locate the barrel adjuster on the rear derailleur or the shifter.
2. If your derailleur has an inline barrel adjuster, turn it counterclockwise to increase tension or clockwise to decrease tension. For a barrel adjuster on the shifter, turning it counterclockwise will decrease tension, and clockwise will increase tension.
3. Shift through all the gears while pedaling forward. The chain should move smoothly across the cassette, without any hesitation or skipping. If you notice issues with shifting, continue adjusting the barrel adjuster until the shifting is smooth.
Step 5: Set the Low Limit Screw
The low limit screw controls how far the derailleur can move towards the outer edge of the largest cog. To adjust it properly:
1. Locate the low limit screw on the rear derailleur. It is usually marked with an “L” or “Low.”
2. Similar to the high limit screw, use a Phillips head screwdriver to turn the low limit screw. Turning it clockwise will decrease the outward movement of the derailleur, and counterclockwise will increase it.
3. Pedal and shift through all the gears. The chain should smoothly transition to the largest cog without any rubbing or noise against the spokes or frame. If you encounter any issues, make small adjustments to the low limit screw until the shifting is smooth.
Step 6: Fine-Tuning the B-Tension Screw
The B-Tension screw adjusts the distance between the jockey wheels and the cassette cogs. Follow these steps to fine-tune it:
1. Locate the B-Tension screw on the upper side of the derailleur body, usually positioned near the derailleur hanger. It is commonly marked with a “B” or “T.”
2. Use a hex wrench to turn the B-Tension screw. Turning it clockwise will increase the distance between the jockey wheels and the cogs, while counterclockwise rotation will decrease the distance.
3. Shift through all the gears while pedaling. Ensure the chain moves smoothly across the cassette without any noise or rubbing against neighboring cogs. If necessary, make small adjustments to the B-Tension screw until the shifting is flawless.
Step 7: Final Check and Test Ride
Once you’ve completed all the adjustments, it’s time for a final check and a test ride. During the test ride, pay close attention to the shifting performance, noise, and chain movement. If any issues persist, review the specific adjustment steps and make further adjustments if necessary.
Remember, achieving the perfect adjustment may take some trial and error to find the optimal settings for your riding style and preferences.
Frequently Asked Questions
1. How do I adjust the cable tension on my SRAM X3 rear derailleur?
To adjust the cable tension, start with the shifter in the highest gear. Turn the barrel adjuster on the rear derailleur counterclockwise to tighten the cable tension or clockwise to loosen it until shifting is smooth and precise.
2. What should I do if my SRAM X3 rear derailleur is not shifting properly?
If shifting is not smooth or accurate, first check the derailleur hanger for any damage. Then, ensure the cable tension is properly adjusted. If the chain is skipping or jumping gears, the derailleur’s high and low limit screws may need adjusting.
3. How do I adjust the high and low limit screws on my SRAM X3 rear derailleur?
To adjust the high and low limit screws, shift the chain onto the smallest chainring and the smallest rear cog for the low limit, and onto the largest chainring and largest rear cog for the high limit. Use the limit screws to align the derailleur with the chain so it doesn’t rub and shifts smoothly.
4. What should I do if my SRAM X3 rear derailleur is making noise while shifting?
If the derailleur makes noise while shifting, check if the jockey wheels are dirty or worn out. Clean or replace them if necessary. Additionally, ensure the derailleur hanger is properly aligned with the cassette and that the chain is properly lubricated.
5. Can I adjust the SRAM X3 rear derailleur without any special tools?
Yes, you can adjust the SRAM X3 rear derailleur using common bike tools. A 5mm Allen wrench is usually needed to adjust cable tension and most limit screws. However, having a small screwdriver to fine-tune the adjustments can make the process easier.
Final Thoughts
In conclusion, adjusting the SRAM X3 rear derailleur is a simple yet crucial task for ensuring smooth and precise shifting on a bike.
By following the step-by-step guide provided in this blog article, riders can confidently make the necessary adjustments themselves. From aligning the derailleur hanger to fine-tuning the cable tension and limits, each adjustment plays a vital role in optimizing the derailleur’s performance.
Remember, mastering the art of adjusting the SRAM X3 rear derailleur may require some practice, but it is well worth the effort. By familiarizing yourself with the process and making regular checks, you can keep your bike in top shape and enhance your overall riding experience.
So, next time you encounter any shifting issues, refer back to this guide on ‘how to adjust SRAM X3 rear derailleur’ and ensure a smooth and efficient ride.