
Mountain bikers always look for ways to improve their performance and tackle challenging terrain. The dropper post has been a game-changer in the cycling world.
This invention lets cyclists quickly change their saddle height while riding. It gives them more control and safety on the trails. Knowing how it works can improve their experience and efficiency.
This article goes into detail about how does a dropper post works, showing how it works mechanically and talking about why riders want to understand how it works.
What Is A Dropper Post?
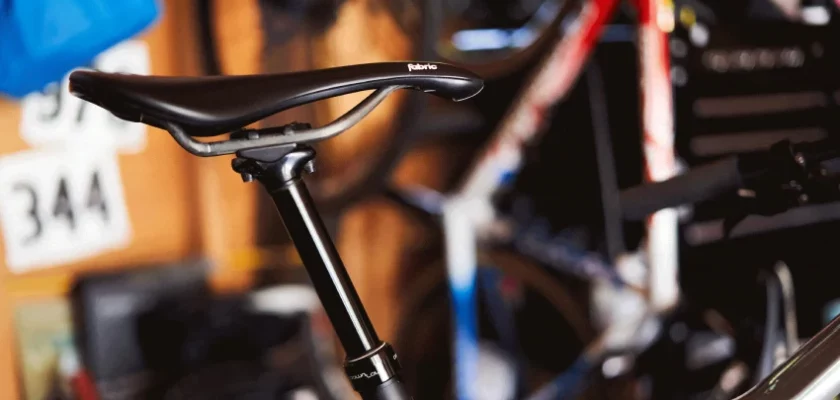
A dropper post, also called a dropper seatpost, is a popular part of mountain bikes. It’s a special seatpost that lets riders change their saddle height while on their bike.
A dropper post’s main job is to make it easy and quick to lower the seat height. This makes moving and controlling the cycle easier on tricky descents or when facing obstacles.
A dropper post has an inner tube, an outer tube, and a way to move it that is either mechanical or hydraulic. The post is usually attached to the bike frame and sticks up from the seat tube. The seat post’s height is controlled by a button that is easy for the rider to reach on the handlebars.
When the rider pulls the lever, the mechanism inside the dropper post opens. This lets the rider lower the saddle to a position of their choice. This lower position gives the rider more room and freedom of movement. It also allows them to move their weight back and lower their center of gravity, which makes them more stable on steep descents.
Structure Of A Dropper Post
A dropper post is made up of several key parts that work together to change the height of the bike. Most of the time, these parts include:
Seatpost: The Seatpost is a tube that holds the bike saddle and can move up and down to change the height. There are different sizes of Seatposts to fit various bikes. They are usually made of light materials like aluminum or carbon fiber.
Internal Hydraulic or Mechanical Mechanism: Dropper posts employ either a hydraulic or mechanical system to control the height adjustment.
- Hydraulic Dropper Posts: Hydraulic dropper posts have a sealed hydraulic cartridge in the seat post. The remote lever releases the pressure, and the seatpost moves up or down. The hydraulic mechanism locks it when you let go of the lever. Hydraulic dropper posts offer smoother and more precise adjustments.
- Mechanical Dropper Posts: Mechanical dropper posts work with cables and springs. Pushing a lever pulls the cable and activates a system inside the seat post. This lets the seatpost move up or down. Releasing the lever locks it in place. Sometimes, the mechanical dropper post needs maintenance and adjusting to work well.
Collar and Clamps: The collar holds the post to the bike frame. It’s near the top of the seat tube, under the saddle. You can tighten or loosen it with bolts or a quick release to keep the device from moving while you ride. Clamps hold the saddle rails on the seat post so that you can adjust the saddle position.
Remote Lever: The lever on the handlebars connects to the seat post and lets the rider adjust the saddle height without taking their hands off the grips. It’s easy to use and works quickly.
How Does A Dropper Post Work?
The primary purpose of a dropper post is to provide greater control and maneuverability, particularly in off-road or mountain biking situations. Here’s how it typically works:
Mechanism: A dropper post is a seatpost that can be moved up or down on a bike. It is controlled by a cable or hydraulic system using a lever or remote.
Control: The rider presses a button or lever to change the seat’s height. This makes the seat go up or down and can be done quickly and easily. The switch or lever is within easy reach of the rider’s hands.
Height Adjustment: When the rider uses the dropper, the Seatpost can go up or down in the seat tube. The amount it moves depends on the dropper model, but it’s usually between 100mm to 200mm (4-8 inches).
Locking: The post stays put once it’s at the right height, so you won’t move around while riding. This helps you keep a comfy and steady position on any terrain.
Return Function: To raise the saddle, the rider uses the control mechanism to unlock the seat post. It may have springs or hydraulic systems to lift the saddle to its original or desired height.
Installation: To install a dropper post, you need to remove the old seat post and put it in the dropper post. The control goes on the handlebar, and the cable or hydraulic line connects it to the post by running along the frame.
What Are The Benefits Of Adding A Seatpost?
Dropper posts aid mountain bikers and other riders in various situations. Dropper posts have these benefits:
Dropper posts help riders control their bike better on steep descents, tight bends, and tricky parts by lowering the saddle and shifting their weight back to decrease their center of gravity. This also improves bike balance and handling.
Taking off the bike saddle makes moving around easier for the rider. This helps riders feel more comfortable navigating challenging terrain and obstacles. With a lower saddle, riders can react and move more quickly.
Moving the saddle down while going downhill helps riders improve stability and control. This allows them to handle steep descents, drops, and tricky areas more aggressively while improving bike handling and traction.
Dropper posts are suitable for going downhill but help with uphill and flat terrain. Riders can adjust the seat height to make pedaling easier when going uphill and can switch between modes without getting off the bike.
Dropper posts help riders adjust their saddle height quickly and easily to match the terrain. This makes it easy to lower or raise the saddle for different parts of the ride, like descents, jumps, climbs, and long distances. This makes riding more versatile and enjoyable.
Dropper posts let riders modify saddle height without stopping or dismounting. Trail riding is improved with the handlebar-mounted remote lever, which makes changes fast and easy.
Can I Add A Dropper Post On Any Bike?
Installing a dropper post on most modern bikes, especially those designed for mountain biking or off-road riding, is generally possible. However, there are a few factors to consider before adding a dropper post to your bike:
Compatibility: Check your bike’s dropper post compatibility first. Your bike frame must have a suitable seat tube diameter and adequate space for the dropper post. You’ll need to match your bike’s seat tube diameter to a dropper post’s 27.2mm, 30.9mm, or 31.6mm diameter.
Internal Routing: Modern dropper posts have internal cable or hydraulic routing. Your bike frame should have ports or channels to route the seat post cable or hydraulic hose internally. If your bike doesn’t have internal routing, you may need to find an external-routing dropper post.
Frame Design: Some frames make dropper post-installation difficult. Some dropper post versions are incompatible with frames with unusual seat tube geometries, excessive frame curves, or suspension connections that interfere with the seat tube.
Frame Size: Your bike frame size can affect dropper post compatibility. Smaller bike sizes may have shorter seat tubes, limiting dropper post-travel length. Make sure your dropper post suits your frame’s travel length.
How To Install A Dropper Post?
Installing a dropper post requires some mechanical knowledge and the right tools. Here is a step-by-step guide on how to install a dropper post:
Step-1: Gather The Tools
You will need a set of Allen wrenches, cable cutters, cable housing cutters, a dropper post, a remote lever, and any additional components specific to the seat post system.
Step-2: Prepare The Bike
Ensure that your bike is clean and stable. If necessary, remove the seat post and saddle from the bike frame.
Step-3: Measure The Height
Determine the desired height for your dropper post by measuring the distance from the bottom bracket to the saddle height you prefer.
Step-4: Remove The Old Seatpost
Loosen the seat post clamp using the appropriate Allen wrench and slide out the old seat post from the seat tube.
Step-5: Install The Post
Insert it into the seat tube, ensuring it is properly aligned and fully inserted. Tighten the seat post clamp securely using the Allen wrench.
Step-6: Install The Remote Lever
Attach the remote lever to the handlebars at a comfortable and easily accessible position. Secure it tightly using the appropriate Allen wrench.
Step-7: Connect The Cables
Route the dropper post cable through the frame’s cable guides or designated routing. Trim the cable and housing to the appropriate length using cable and housing cutters. Attach the cable to the post actuator and secure it tightly. Connect the other end of the cable to the remote lever, ensuring it is properly tensioned.
Step-8: Test And Adjust
Operate the device using the remote lever to raise and lower the saddle. Make sure it moves smoothly and without any issues. Adjust the cable tension if necessary.
Can I Use A Dropper Post On A Road Bike?
Yes, Dropper posts are primarily used in mountain bikes, but some road bikes for gravel or adventure riding can also use them. Check if your road bike frame is compatible before installing one.
Final Words
The dropper post is a new piece of technology that has changed how mountain biking is done because of how it is made and works. Riders can adjust the height of their saddles without stopping. This improves control, steadiness, and performance.
It allows riders to change and do well in any situation, whether going down steep hills, climbing steep hills, or going through technical trails. As technology improves, dropper posts will probably get even better and more refined, making mountain biking even more fun and valuable.