
Bicycles are a healthy and easy way to get around that is also good for the environment. But a twisted bike chain can be annoying, especially if you’re in the middle of a ride or getting ready to start one.
Getting a bike chain untangled might seem challenging, but it’s easy to do with the right plan and some time. This article aims to give complete help on how to untangle a bike chain.
Reasons For Tangled Bike Chain
A bike chain can become tangled due to several reasons, including:
Improper shifting: If you change speeds too quickly or at the wrong time while pedaling, the chain might not move smoothly from one gear to the next. This can throw off the chain’s alignment and make it more likely to get twisted.
Chain slack: If the chain is loose, it can move too much and get stuck on other parts like the derailleur or chainrings. Make sure to keep it tight.
Incorrect installation: Incorrectly installing the bike chain can cause it to become tangled. This can happen if it’s not threaded correctly through the derailleur or connected with the master link.
Damaged or worn components: Parts of your bike, like the chain, cassette, chainrings, and derailleur, may wear out over time. This can cause the chain to skip, jump, or tangle if the teeth or gears become rough.
Foreign objects: Objects like sticks, leaves, or clothing can get stuck in the drivetrain and tangle the chain.
Untangling A Bike Chain With Or Without Tools? What Should You Do?
Deciding if you can fix a tangled bike chain without tools or with tools depends on how bad the tangle is, how much experience you have with bike maintenance, and if you have tools available. Here are some things to think about before making a decision.
If the chain is slightly twisted or has a few knots, you can untangle it without tools using your hands and basic techniques.
If the chain is tangled severely, stuck between gears, or wrapped around the derailleur, you may need tools to untangle it without causing any harm.
If you know how to fix bikes and use tools, using the right tools to untangle the chain is better. But if you’re new or don’t have experience, it’s safer to untangle it without tools to avoid making things worse.
Check if you have bike tools like chain tools, pliers, or multitools. If you have them, it can be helpful to use them if the chain is tangled.
Untangling Bike Chain With Hands
Follow these steps to untangle a bike chain with your hands:
Step 1: Identify The Jammed Section
Look at the chain closely to find where it’s tangled or jammed. It might be twisted, knotted, or wrapped around the chainrings or derailleur. Knowing how it’s tangled will help you figure out how to untangle it.
Step 2: Loosen The Tension
Make it easier to untangle the chain by reducing tension. Move the chain to the smallest chainring and rear cog to create slack.
Step 3: Manual Manipulation
Use your hands to work on the tangled chain gently. Move the links slowly to untangle the twisted section. Use your fingers to push, pull, or lift the specific links. Be patient and don’t rush, as this may worsen the tangle.
Step 4: Rotating The Crankset
Try rotating the pedals backward while gently pushing the chain to loosen a tight chain on the bike. This should help to untangle it from the chainrings.
Step 5: Assess And Repeat
Assess progress after trying to untangle. If it’s still tangled, repeat steps 3 and 4 until it improves. It may take several tries to untangle fully.
Untangling Bike Chain With Tools
Learn how to unkink a bike chain using standard tools with this easy-to-follow guide, step by step.
Tools Required
- Chain tool or a quick-link opener (if applicable)
- Pliers
- Chain lubricant (optional)
- Clean cloth or rag
Step 1: Assess The Situation
Before you start fixing a tangled chain, check how bad it is. Is it a simple knot, or is the chain tightly wrapped around the gears or other parts? Knowing how bad it is will help you pick the right tools and methods.
Step 2: Prepare The Bike
Make sure the bike is stable before untangling it. You can flip it over or use a bike stand to keep it balanced and prevent it from falling.
Step 3: Inspect And Loosen The Chain
Check the chain for any tangled, twisted, or caught areas. Move the derailleur or use a chain tensioner tool to loosen it up if you can. This will make it easier to work with and remove any tension.
Step 4: Separate The Tangled Sections
To untangle a chain:
- Use pliers to separate the twisted sections gently.
- Be careful with crooked or overlapping links, and straighten them out slowly.
- Don’t pull or force the chain too hard, as it can cause more damage.
- Be patient.
Step 5: Slowly Rotate The Pedals
After fixing the first part of the chain, turn the pedals backward slowly. This way, you can find other issues or spots that need more attention. Keep straightening out any tangles left while turning the pedals.
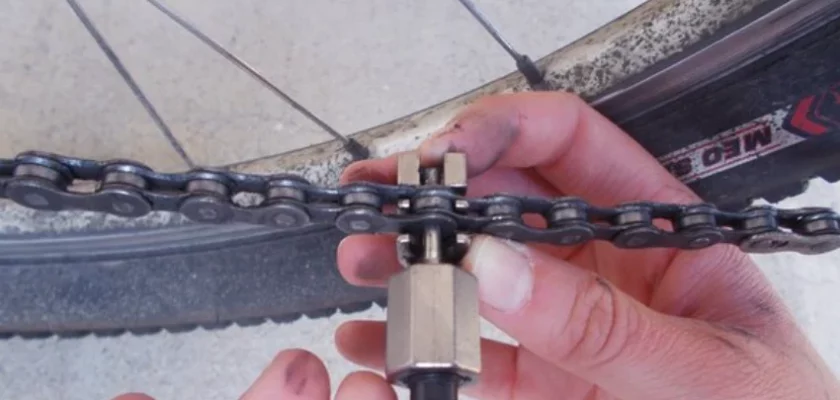
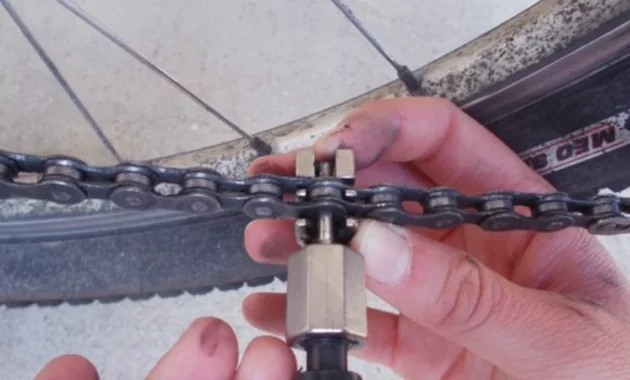
Step 6: Remove The Chain (If Necessary)
If your bike chain is severely tangled, you may need to remove it altogether to untangle it. To do this, use a chain tool according to the manufacturer’s instructions. Remember to keep track of the order and direction of the chain links so you can reassemble them correctly.
Step 7: Reassemble The Chain
Now it’s time to put the chain back together. Ensure the chain ends are lined up correctly and facing the right way. To fix it, utilize the chain tool to push the pin back into position. Be careful to push it a little, or the links may weaken.
Step 8: Lubricate And Clean The Chain
After fixing the tangled chain, it’s an excellent time to clean and lubricate it. Use the recommended lubricant and wipe off any extra with a clean cloth. This will keep the chain working well and prevent more tangles.
Final Thought
You can successfully untangle your bike chain with the right tools, patience, and a systematic approach. Take the time to assess the situation, and Please follow the step-by-step instructions in this guide.
Remember to be gentle with the chain and keep it lubricated and clean. By doing so, you’ll enjoy a smoother and more enjoyable cycling experience.
Related Articles: