Have you ever wondered how to balance a bike tire? If you’re a cyclist or even just a casual rider, you know how important it is to have a smooth and balanced ride.
Unbalanced bike tires can cause annoying vibrations, decrease overall stability, and even lead to premature wear and tear.
Whether you’re a beginner or an experienced cyclist, learning to balance your bike tires is a valuable skill that can improve your overall riding experience. From adjusting weights to checking for irregularities, we will cover all the necessary techniques and tools for achieving optimal balance.
So, let’s dive in and discover how to balance a bike tire effectively, ensuring a smoother and more enjoyable ride every time.
Balancing A Bike Tire: The Guide

One crucial aspect of bike maintenance is ensuring that your bike tires are balanced. The balance of your bike tire affects not only your ride quality but also the longevity of your tires.
Why is Balancing Your Bike Tire Important?
Before diving into the “how-to” aspect, let’s first understand why balancing your bike tire is important. When a bike tire is unbalanced, it can lead to various issues that can affect your ride, including:
Vibration: An unbalanced tire can create excessive vibrations, making your ride uncomfortable and even causing potential muscle fatigue.
Premature Wear: Imbalances can lead to uneven wear on your bike tire, resulting in a shorter lifespan and the need for frequent replacements.
Handling and Stability: A balanced tire provides better handling and stability, allowing you to navigate corners and rough terrains with ease.
Now that we’ve established the importance of balancing your bike tire let’s delve into the step-by-step process.
Step 1: Remove the Wheel
To balance your bike tire accurately, you’ll need to remove the wheel from the bike frame. Follow these steps:
- Shift the bike’s gear to the smallest chainring and the smallest rear cog.
- Release the brake by either squeezing the brake lever or unhooking it from the brake arm, depending on the type of brakes on your bike.
- Open the quick-release lever or loosen the axle nuts to release the wheel from the bike frame. Carefully lift the wheel out of the dropouts.
Step 2: Prepare the Balancing Stand
To balance your bike tire effectively, you’ll need a balancing stand. Follow these steps to set it up:
- Find a sturdy and level surface to set up your balancing stand.
- Place the stand on the surface, ensuring it is stable and won’t wobble during the balancing process.
- Adjust the stand’s width to accommodate your bike wheel size. Most stands have adjustable pins or cones that can be moved to match the width of your wheel axle.
Step 3: Mount the Wheel on the Balancing Stand
Now that you have your stand ready let’s mount the wheel on it for balancing:
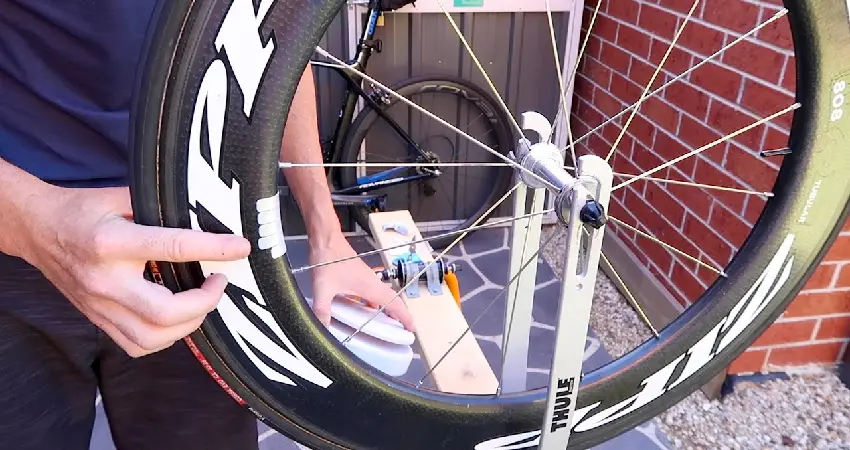
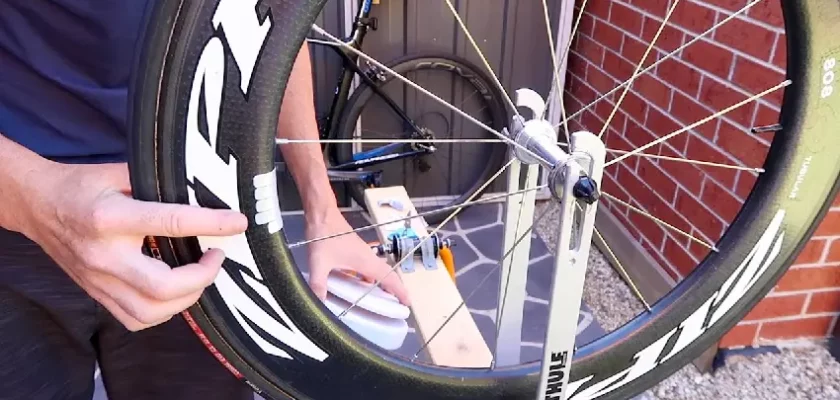
- Insert the axle of the wheel through the appropriate holes on the balancing stand, ensuring it fits snugly.
- Spin the wheel to see if it rotates freely without any obstructions. If you notice any rubbing or resistance, check if the wheel is seated properly on the stand.
- Allow the wheel to come to a complete stop, ensuring it’s perfectly balanced on the stand.
Step 4: Identify the Heavy Spot
Identifying the heavy spot of your bike tire is crucial for achieving a well-balanced wheel. Here’s how you can do it:
- Observe the rotation of the wheel as it comes to a stop. The heavy spot will cause the wheel to settle in the same position with the valve stem pointing downwards.
- Mark the spot on the tire rim with a piece of chalk or a marker. This spot will help you determine where to add weight to achieve balance.
Step 5: Add Weights to Balance the Wheel
To balance your bike tire accurately, you’ll need to add weights strategically. Here’s how:
- Choose the appropriate balancing weights. There are various types available, such as adhesive weights, spoke weights, and clip-on weights. Select the type that is compatible with your rim type.
- Attach the chosen weight to the opposite side of the heavy spot on the tire rim. Start with a small weight and gradually increase until the wheel is balanced.
- Spin the wheel again and observe if it settles differently. Add or remove weights as needed until the wheel comes to a stop with the valve stem pointing straight up.
Step 6: Check the Balance
Now that you’ve added the necessary weights let’s check the balance of your bike tire:
- Spin the wheel once again and observe its rotation. It should come to a stop without any noticeable wobbling or settling in a specific position.
- Repeat the previous steps if you notice any imbalance. Fine-tune the weight placement until you achieve a perfectly balanced wheel.
Step 7: Remount the Wheel
Once you have successfully balanced your bike tire, it’s time to remount the wheel back onto your bike:
- Lift the wheel and carefully align it with the dropouts on the bike frame.
- Slide the axle into the dropouts and ensure it is completely seated.
- Tighten the quick-release lever or axle nuts securely to hold the wheel firmly in place.
- Test the wheel by giving it a spin while checking for any rubbing or misalignment. Adjust if necessary.
Congratulations! You have successfully balanced your bike tire. Your ride will now be more comfortable, stable, and your tires will last longer.
Frequently Asked Questions
1: How do I know if my bike tire needs balancing?
If you experience vibrations in the handlebars or seat while riding, it is likely that your bike tire needs balancing. Another indication is uneven wear on the tire tread.
2: What tools do I need to balance a bike tire?
To balance a bike tire, you will need a wheel balancer or truing stand, wheel weights, and a spoke wrench. Additionally, a valve core remover tool may be required to install or remove wheel weights.
3: How do I balance a bike tire using wheel weights?
Start by mounting your bike tire on the wheel balancer. Then, position wheel weights on the rim opposite the heaviest spot. Gradually add or remove weights until the tire rests horizontally, indicating balanced alignment.
4: Can I balance my bike tire without a wheel balancer?
While a wheel balancer provides accurate results, you can balance your bike tire without one. An alternative method involves carefully rotating the tire by hand and noting any heavy spots, then adding weights accordingly.
5: How often should I balance my bike tires?
Balancing your bike tires should be done whenever you notice signs of imbalance or when you get new tires installed. Additionally, regular maintenance, such as proper inflation and regular rotation, can also help prevent balance issues.
Final Thoughts
In conclusion, balancing a bike tire is a crucial step to ensure a smooth and safe ride. By following the simple steps discussed throughout this blog article, you can easily achieve a balanced bike tire. Remember to remove any excess weights, adjust the tire pressure, and check for any abnormalities or signs of wear.
Regularly balancing your bike tire not only improves your biking experience but also prolongs the lifespan of your bike and reduces the risk of accidents. So, the next time you feel a slight wobble or vibration, refer back to this guide on how to balance a bike tire for a hassle-free ride.

