
Want to maintain the optimal performance of your Avid XO brakes? Well, you’ve come to the right place. In this blog article, we’re going to delve into the process of bleeding your Avid XO brakes, step by step.
So, whether you’re a seasoned rider or a newcomer to the world of mountain biking, this guide will equip you with the necessary knowledge and skills to get those brakes working like a dream.
You may be wondering, why is bleeding Avid XO brakes so important? As avid cyclists ourselves, we understand the frustration of mushy or unresponsive brakes. But fear not! By following our simple instructions on how to bleed Avid XO brakes, you’ll be able to eliminate any air bubbles that may have built up in the system, ensuring a firm and reliable brake feel every time you hit the trails.
So, let’s dive right in and discover the ins and outs of bleeding your Avid XO brakes, shall we?
Bleed Avid Xo Brakes: Ultimate Guide
When it comes to Avid XO brakes, bleeding them regularly is essential to maintain their optimal performance. Bleeding brakes removes any air bubbles from the brake lines, ensuring proper lever action and consistent braking power.
Gather the Tools Required
Before you begin bleeding your Avid XO brakes, make sure you have all the necessary tools:
- Avid Professional Brake Bleed Kit: This kit contains a syringe, tubing, bleed nozzle, and threaded syringe adapter designed specifically for Avid brakes.
- 3mm and 4mm Allen wrenches: These are needed to remove the brake lever from the handlebars and the bleed port screw on the caliper.
- Clean cloth or paper towels: To wipe off any excess brake fluid or spills.
- Isopropyl alcohol: For cleaning any brake fluid spills or drips.
Prepare the Brake System
To begin the bleeding process, follow these steps:
- Position your bike: Place your bike on a stable surface such as a bike stand or secure it in a way that allows easy access to the brakes and lever.
- Remove the wheel: Take off the wheel from the Avid XO brake you are working on. This will make accessing the caliper and bleed port easier.
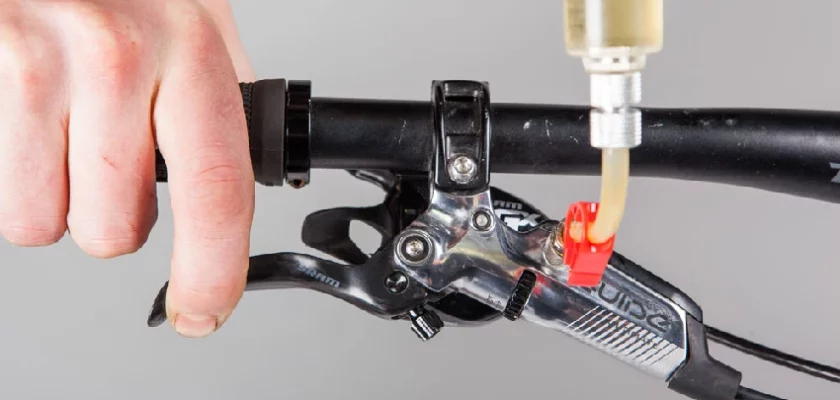
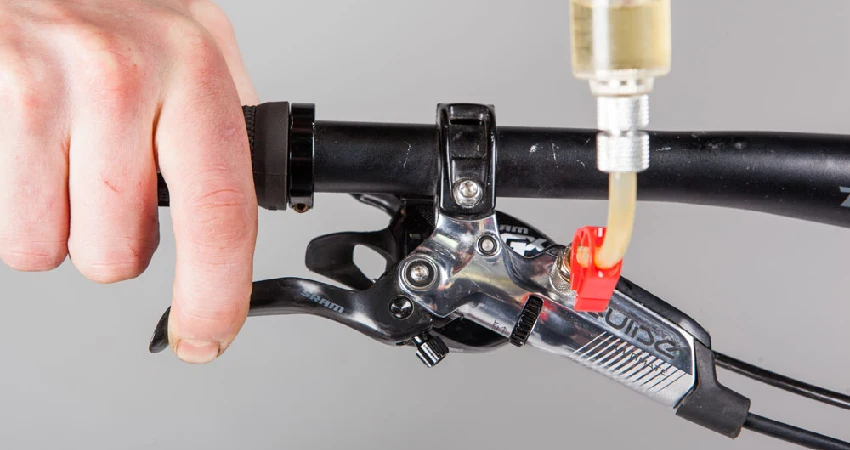
Attach the Bleed Kit to the Brake Lever
Now that you have your tools ready and your bike positioned, let’s attach the bleed kit:
- Loosen the brake lever: Use a 4mm Allen wrench to loosen the bolt that holds the brake lever to the handlebars. You don’t need to remove the lever entirely, just enough to create a gap for the bleed kit to be attached.
- Attach the bleed kit: Take the threaded syringe adapter from the Avid Professional Brake Bleed Kit and screw it into the lever’s hole. Once securely attached, place the syringe into the adapter, making sure it fits tightly.
Prepare the Brake Caliper
Moving on to the caliper, follow these steps:
- Remove the bleed port screw: Use a 3mm Allen wrench to gently remove the bleed port screw located on the top of the caliper. Place the screw in a safe place, as you will need to reinstall it later.
- Prepare the catch bottle: Attach the other end of the tubing from the bleed kit to the bleed port on the caliper. Position the catch bottle securely below the caliper to collect any brake fluid that will come out during the bleeding process.
Bleeding the Avid XO Brakes
With the bleed kit attached to both the lever and caliper, it’s time to start bleeding the brakes:
Check the brake fluid level: Make sure the syringe attached to the lever is filled with fresh brake fluid. Slowly push the plunger on the syringe until you see the fluid travel through the tubing towards the caliper. This helps ensure there are no air bubbles in the system.
Bleed the caliper: With the brake fluid in the syringe, start by gently squeezing the brake lever a few times. While holding the lever, open the bleed port on the caliper by turning it counterclockwise. As the pressure releases, you will start to see the brake fluid flowing into the catch bottle.
Push fluid through the system: Keep the lever squeezed and watch for air bubbles in the tubing or catch bottle. While maintaining pressure on the lever, use the syringe to push fluid into the caliper by gently pushing the plunger. Continue this process until you see a steady stream of brake fluid with no air bubbles coming out of the bleed port.
Close the bleed port: Once you are confident there are no air bubbles left, close the bleed port by turning the screw clockwise using a 3mm Allen wrench. Be careful not to overtighten it.
5. Disconnect the bleed kit: Remove the syringe adapter from the lever and screw the brake lever back onto the handlebars using a 4mm Allen wrench.
Finishing Up
You’re nearly done! Here are the final steps to complete the bleeding process:
Check lever action: Before reinstalling the wheel, squeeze the brake lever a few times to ensure a firm lever action. The lever should engage smoothly and not feel spongy.
Clean up: Wipe off any excess brake fluid or spills using a clean cloth or paper towels dampened with isopropyl alcohol. This will help keep your bike clean and prevent any potential damage to the finish.
Reinstall the wheel: After confirming the brake lever’s action and ensuring everything is clean, reinstall the wheel on your Avid XO brake.
Test the brakes: To ensure a successful bleed, take your bike for a short ride and test the brakes’ responsiveness. If the brakes feel solid and engage smoothly, congratulations – you have successfully bled your Avid XO brakes!
Frequently Asked Questions
1. How often should I bleed my Avid XO brakes?
It is recommended to bleed your Avid XO brakes every 6-12 months, or whenever you experience spongy or inconsistent brake performance.
2. What tools do I need to bleed Avid XO brakes?
To bleed Avid XO brakes, you will need an Avid Bleeding Kit, a DOT brake fluid, a Torx T10/T25 wrench, a syringe, and a bleed block.
3. Can I use a different type of brake fluid to bleed Avid XO brakes?
No, it is important to use DOT brake fluid specifically designed for Avid XO brakes. Using a different type of brake fluid can damage the brake system and affect performance.
4. How do I know if there is air in my Avid XO brakes?
If your brake lever feels spongy, requires excessive lever travel, or the brakes lack sufficient stopping power, there may be air in the brake system. Bleeding the brakes can help remove any trapped air.
5. Do I need to remove the brakes from my bike to bleed Avid XO brakes?
No, you can bleed Avid XO brakes without removing them from your bike. However, make sure to protect your frame and components from any brake fluid spills during the bleeding process.
Final Thoughts
To conclude, bleeding Avid XO brakes is a crucial maintenance task that ensures optimal performance and safety while cycling. By following the step-by-step process outlined in this article, riders can confidently tackle this procedure themselves.
Remember, the key is to have the necessary tools at hand, such as a bleed kit and a clean workspace. Understanding the steps involved, from preparing the brake system to purging air and checking for leaks, will help ensure a successful bleed process.
By mastering this skill, cyclists can maintain their Avid XO brakes and enjoy smooth, reliable braking on every ride. So, go ahead and confidently perform the necessary steps to bleed Avid XO brakes for a more efficient and enjoyable cycling experience.