
Brake pads are necessary for bikes to slow down or stop when the brakes are used. When the rider pulls the brake lever, the pads press against the spinning brake disc or rim, creating friction. This friction turns the bike’s moving energy into heat energy and slows it down.
The quality and effectiveness of brake pads play a crucial role in a bike’s ability to stop and ensure safety. They are essential in regulating speed and giving riders confidence and control.
Maintaining good brakes is crucial for a bike to be safe and function properly. Brake pads are essential components of the braking system, and it’s vital to clean and maintain them regularly to ensure optimal performance.
My article offers a step-by-step process of How To Clean Brake Pads, ensuring reliable and efficient brake performance.
Build Up OF The Brake Pads
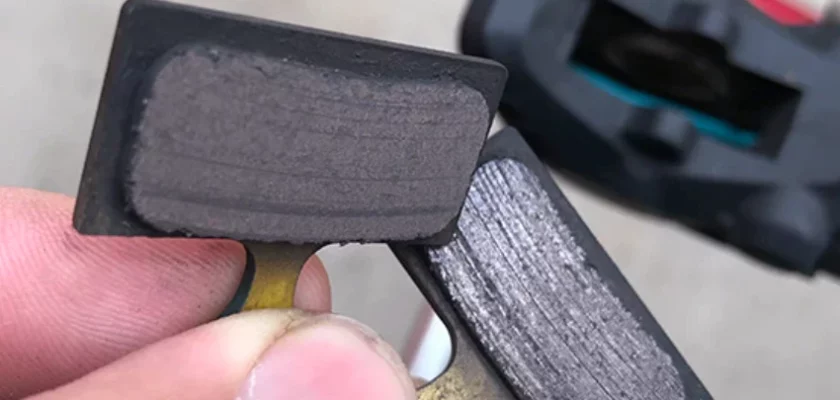
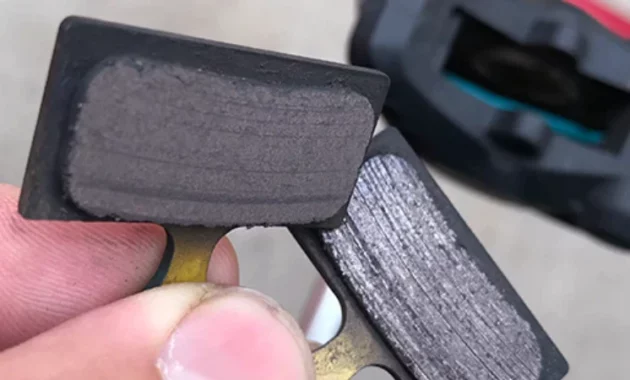
The amount of brake pad material on a bicycle depends on the type of brake system, riding conditions, and maintenance. Rim brakes have rubber or composite pads that touch the rim’s surface. Dirt, dust, and metal particles can build up on the pads over time.
Brake pad material buildup can cause weak braking, noise, and vibrations. Adjusting or replacing worn brake pads can help keep brakes working well. Regularly inspect and clean brake pads and rims to avoid too much buildup and keep braking consistent.
The brake pads on the disc brakes touch a metal rotor. They don’t get as dirty as rim brakes but can still collect dust and residue. This can affect how well the brakes work.
To keep your brakes working well, it’s essential to keep them clean and well-maintained. Check and clean your brake pads and rim surfaces or rotors regularly, depending on the type of brakes you have.
This will help prevent too much brake pad material from building up and ensure your brakes work correctly.
Preparations
To ensure a successful cleaning process for your bike’s brake pads, there are some essential preparatory steps that you should take.
- Choose a place with good ventilation and lighting when cleaning your bike’s brake pads. Chemicals like isopropyl alcohol or brake cleaner may produce fumes, so working in a well-ventilated area is essential to avoid inhaling them. Good lighting helps you spot any dirt or buildup on the brake pads.
- Wearing gloves is optional but recommended, as it can protect your hands from any chemicals, dirt, or residue that may be present on the brake pads. Gloves also help maintain cleanliness and prevent the transfer of oils from your hands onto the brake pads.
- Before cleaning your bike’s rim brake pads, release the brake mechanism. You can do this by squeezing the brake caliper arms together to create enough space for effective cleaning. This step ensures that the brake pads are easily accessible for cleaning.
- If your bike has disc brakes, follow the manufacturer’s instructions for cleaning. Different systems may need other cleaning methods to work correctly and safely. This will help you avoid damaging the brake pads or the brake system.
Gather The Required Tools
To clean a bike’s brake pads properly, having the following tools on hand is crucial.
Clean cloth or rag: To clean brake pads, use a clean cloth or rag made of lint-free material. Wipe away loose debris, dirt, and brake dust from the surface of the brake pads.
Isopropyl alcohol or brake cleaner: To clean brake pads, you need a special cleaning agent like isopropyl alcohol or brake cleaner.
Isopropyl alcohol with a high percentage (70% or more) can remove grease, oil, and brake dust. Brake cleaner can remove tough grime. Use suitable isopropyl alcohol and avoid rubbing alcohol, as it might leave residues.
Water (if using isopropyl alcohol): When using isopropyl alcohol to clean your brake pads, it’s essential to have water nearby to rinse them afterward. To ensure a clean surface, removing any remaining residue is necessary. Use clean water in a bucket or bowl.
A toothbrush or small brush: Use a toothbrush or stiff brush to clean brake pads. It can remove dirt and brake dust from crevices effectively. Make sure the brush is clean and dry before using it to prevent adding more dirt.
Screwdriver or Allen key (if necessary): Sometimes, you might need a screwdriver or Allen key to remove them from the brake caliper or brake shoes. Check the brake system of your bike to know which tool you need.
Bucket or bowl (if using water): If you rinse the brake pads with water after using isopropyl alcohol, a bucket or bowl is necessary to hold clean water. Ensure the container is clean and free from contaminants that could transfer to the brake pads.
Gloves (optional): You don’t have to wear gloves while cleaning, but it is suggested. Gloves can protect your hands from chemicals, dirt, or residue on the brake pads. They can also provide a better grip and stop oils from your skin from getting on the brake pads.
How To Clean Brake Pads
To clean the brake pads of a bike thoroughly, follow the step-by-step process outlined below, which includes detailed explanations for each step:
Step 1: Gather the Required Tools
Gather tools: cloth, alcohol/brake cleaner, water (if using alcohol), brush, screwdriver/Allen key, bucket/bowl (if using water), gloves (optional).
Step 2: Prepare the Work Area
Clean your bike in a well-ventilated and well-lit area. Use a clean cloth or old newspaper to protect the surface from dirt and debris.
Step 3: Remove the Brake Pads (if necessary)
Remove brake pads from the brake caliper or brake shoes to clean them thoroughly. Use a screwdriver or Allen key to carefully loosen and remove them, keeping in mind their placement so you can put them back correctly later.
Step 4: Wipe Away Loose Debris
Clean the surface of the brake pads with a cloth to remove dirt and brake dust. Pay attention to any buildup and remove as much debris as possible. This will prepare the brake pads for deeper cleaning.
Step 5: Apply Isopropyl Alcohol or Brake Cleaner
To clean brake pads, use isopropyl alcohol and a cloth. If the pads are dirty, you can spray a specialized brake cleaner directly onto them. Please wait a few minutes for the cleaner to work its magic.
Step 6: Scrub the Brake Pads
Take a toothbrush or small brush with stiff bristles and use it to scrub the brake pads in a back-and-forth motion. Focus on areas with visible dirt or residue, applying gentle pressure to dislodge embedded particles effectively.
The brush’s bristles will help remove dirt from crevices and ensure a thorough cleaning. Repeat this process until the brake pads appear clean and free from significant buildup.
Step 7: Rinse (if using isopropyl alcohol)
After cleaning the brake pads with isopropyl alcohol, rinse them with water to remove any remaining residue. Fill a container with clean water, then dip the brake pads in and move them around gently to ensure all the alcohol and dirt are washed off. It’s essential to rinse the brake pads thoroughly so that they are clean and work properly.
Step 8: Dry the Brake Pads
After washing, dry the brake pads with a clean cloth. Make sure they are completely dry before putting them back. Wet pads can affect braking and collect debris.
Step 9: Reinstall the Brake Pads (if applicable)
Carefully reinstall the brake pads in their original position, following the specific instructions for your bike model. Ensure they are securely fastened and appropriately aligned. Double-check that the brake pads are correctly positioned and oriented to ensure efficient braking.
Step 10: Final Inspection
Check the brake pads for debris or damage after cleaning and reinstalling them. Please make sure they are straight and thick enough. Also, check the brake caliper or brake shoes to ensure they work well and are correctly adjusted.
Step 11: Test the Brakes
Test the brakes before riding your bike after cleaning and reinstalling the brake pads. Squeeze the brake levers and see if they work well and can stop your cycle. If you notice any problems, like weaker brakes or strange sounds, you should check or fix them more.
Additional Tips
- When cleaning the brake pads, check for wear or damage. Replace them immediately if they’re too worn or show cracks or uneven wear.
- Make sure you have good ventilation and don’t get isopropyl alcohol or brake cleaner in your eyes or on your skin. Read and follow the instructions from the cleaning agent’s manufacturer.
- If the brake pads have stubborn dirt that regular cleaning can’t remove, you might need professional help or replace the pads.
- Check your bike’s brake rims or discs often for wear or damage. Even if the brake pad is clean, the surface it touches needs to be in good condition for optimal braking.
Final Words
Cleaning your bike’s brake pads regularly is important for safe and efficient braking. Use this guide to clean them effectively and check for wear or damage. Replace the pads when needed.
Different brake systems may need additional cleaning methods. Check the manufacturer’s instructions or ask a professional if you need help cleaning your bike’s brake pads.
Cleaning your brake pads regularly is vital for a safe and enjoyable cycling experience. Maintaining your bike’s braking system is essential for it to function well.
Happy cycling!
