
Meta-Maintain peak braking performance with proper care. Replace worn pads, inspect rotors, and clean calipers, and pistons. Keep brakes in top shape for safety.
Disc brakes are integral to modern vehicles, providing reliable and efficient stopping power. However, dirt, grime, and brake dust can accumulate over time on the disc rotors and brake pads, compromising their performance and potentially leading to brake failure.
Regular cleaning and maintenance of disc brakes are essential for ensuring optimal braking performance and prolonging their lifespan. This article will tell you the step-by-step process of how to clean disc brakes, enabling you to maintain the safety and functionality of your braking system.
Understanding Disc Brake Components
Understanding the critical components of disc brakes before starting the cleaning process is essential.
Rotor: The rotor is a metal disc that is round and is connected to the hub of the wheel. It is the part that makes the brake pads rub against each other to slow or stop the bike.
Bicycle rotors are available in different sizes and shapes, and can be made from various materials like cast iron or stainless steel, depending on the bike’s specific purpose.
Brake Pads: The brake pads go inside the caliper and press against the wheel to make the brakes work. Most of the time, they are made of different materials, like organic compounds, compounds that are half-metallic, or clay materials.
Every kind of brake pad material has its own stopping power, how long it lasts, and how loud it is.
Caliper: The caliper is an important part of the method for stopping with disc brakes. It slows down or stops the bike by pressing the brake pads against the wheel.
Bicycle disc brakes use different kinds of calipers, such as moving calipers, sliding calipers, and fixed calipers. The brake pads are held in the caliper, which is also how they move.
Pistons: When you press the brake lever on the handlebar of your bike, rollers inside the caliper push the brake pads onto the rotor.
Most of the time, the pistons are inside the caliper and move when hydraulic pressure or mechanical force from the user is applied.
This makes the necessary friction between the brake pads and the rotor, which slows down or stops the bike.
Tools Needed For Cleaning Disk Brakes
To achieve the best braking performance and increase the lifespan of your bike’s brake system, It’s important to do routine upkeep like cleaning the disc brake.
This process eliminates contaminants such as oil, dirt, and brake pad residue from the brake rotor and caliper. Commonly used tools for cleaning the disc brake of a bike include:
Isopropyl Alcohol: Isopropyl alcohol is an important tool for cleaning brake wheels and pads. It works well to break down and eliminate contaminants like oil, grease, and other leftovers that could hurt how well the brakes work.
Clean Cloth or Paper Towels: Wipe the brake rotor and caliper surfaces with soft, clean cloths or lint-free paper towels after applying the cleaning solution. They help remove dirt and dust from the brake parts without scratching.
Brake Cleaner Spray: Brake cleaner sprays are made to remove dirt and grime that are hard to get off the disc brakes. These sprays usually have strong solvents that evaporate quickly and don’t leave any residue behind.
Small Brush: You can gently clean the brake wheel and caliper with a small brush with soft bristles. It helps remove dirt and brake pad dust from the rotor vents or between the brake caliper pistons.
Screwdriver or Pry Tool: Sometimes, you might need a screwdriver or a unique tool to pry the brake pads off the caliper. This lets the pads and caliper be cleaned and checked more thoroughly.
Compressed Air (Optional): Compressed air can help blow away loose dirt and dry the brake parts well after cleaning them. But care must be taken not to blow dangerous particles into other parts of the bike or breathe them in.
Latex or Nitrile Gloves: If you wear gloves while cleaning, oil and dirt won’t get transferred from your hands to the brake parts. It also keeps you safe from any chemicals that could be dangerous that are used to clean.
Torque Wrench: If you need to take the brake parts apart and put them back together during the cleaning process, You need a torque wrench to ensure that the bolts and screws are tightened the way the maker says they should be.
Clean, Dry, and Well-Lit Workspace: An excellent desk to clean well is essential. Ensure the area is clean, free of dust, and well-lit so you can see the parts of the brakes. Moisture can make it hard to clean the brakes and cause them to rust if it’s around.
How To Clean Disc Brakes – Steps
Step-by-Step Cleaning Process: Follow these steps to clean disc brakes thoroughly:
Step 1: Preparation
- Make sure the bike is parked in a safe place with plenty of airflow.
- Use the parking brake or a wheel chock to keep the car from moving by mistake.
- Consider wearing gloves to protect your hands while you’re cleaning.
Step 2: Removing The Wheel (If Necessary)
- Check the brake rotor carefully for signs of wear, such as deep lines or warping.
- If problems are found, look professionally at them and consider replacing them.
- Check the brake pads to see if they are old. Replace them if the thickness of the pads is less than what the maker says is the minimum.
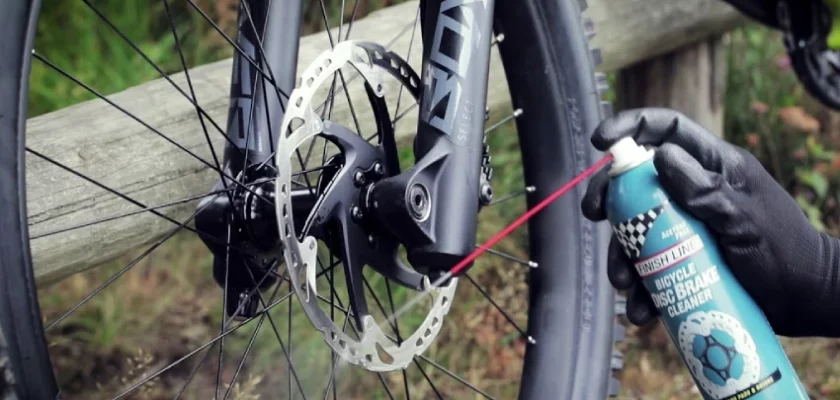
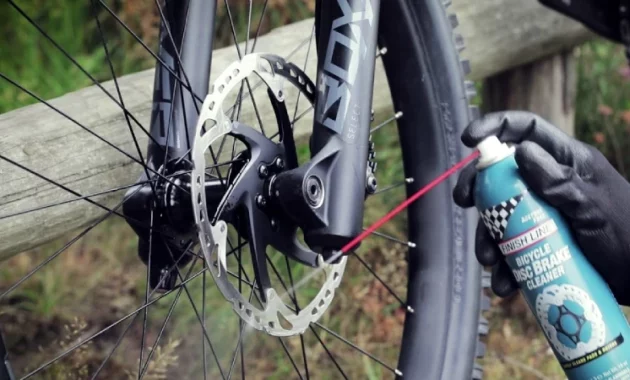
Step 3: Cleaning The Brake Rotor
- Spray the surface of the wheel with isopropyl alcohol or brake cleaner.
- Wipe the rotor in a circle with a clean cloth or lint-free towel to remove any dirt, oil, or brake dust that has built up.
- Repeat the steps until the rotor looks clean and free of dirt or other debris.
Step 4: Cleaning The Brake Pads
- Carefully take the brake pads off the caliper by following the directions in the user manual.
- Check the brake pads for wear that isn’t even glazing or dirt. Replace them as needed, following the instructions from the maker.
- Use a small, soft-bristled brush to clean both sides of the brake pads and remove dirt and brake dust.
- If the brake pads are dirty, soak them in rubbing alcohol for a few minutes, then use the brush to clean them.
- Use a clean cloth to dry the brake pads.
Step 5: Cleaning The Caliper
- Spray the caliper with isopropyl alcohol or brake cleaner, paying close attention to the pistons and brake pad holes.
- Use a soft brush to scrub the caliper gently, cleaning it well, especially the pistons and the holes for the brake pads.
- Use a clean cloth or lint-free towel to wipe away any dirt, dust, or debris from the caliper.
- Check to see if the caliper is broken or rusty.
Step 6: Reassembling And Reinstalling
- Once everything is clean and dry, carefully put the brake pads back into the caliper, ensuring they are in the right place.
- Follow the manufacturer’s directions to ensure the wheel is securely attached.
- Depending on what you need to do, tighten the quick-release skewer or axle nuts to the specs given.
- Repeat the cleaning steps for each of the bike’s wheels and brakes.
Step 7: Testing And Final Checks
Before taking the bike out for a ride:
- Once everything is clean and dry, carefully put the brake pads back into the caliper, ensuring they are in the right place.
- Follow the manufacturer’s directions to ensure the wheel is securely attached.
- Depending on what you need to do, tighten the quick-release skewer or axle nuts to the specs given.
- Repeat the cleaning steps for each of the bike’s wheels and brakes.
Post-Cleaning Maintenance
After cleaning the bike’s disk brakes, it’s a good idea to perform some routine maintenance tasks:
- Use a clean cloth to wipe the surface of the rotor with a thin layer of brake rotor cleaner or isopropyl alcohol to get rid of any dust still there.
- Look for signs of wear or damage on the brake wires and housing.
- If you need to, replace them.
- Check the stop lever and move or tighten it if necessary.
- You should use a good bicycle lubricant on the moving parts of the caliper and lever mechanism.
- Check the bike’s user instructions or talk to a professional about how to take care of it.
Regular Inspection And Cleaning
To maintain optimal brake performance, regularly inspect and clean your bike’s disk brakes:
- Keep an eye out for wear on the brake pads and replace them when they hit the minimum thickness recommended by the manufacturer.
- Check the rotor for wear, bending, or dirt, and immediately take care of any problems.
- Keep the caliper, brake pad slots, and pistons clean and free of dirt, debris, and brake dust.
- Clean the rotors and pads if you notice less stopping power or noise when you brake.
- By performing regular inspections and cleaning, you can ensure the longevity and effectiveness of your bike’s disk brakes.
Conclusion
Cleaning the disc brakes on a bike is an important maintenance job that ensures the brakes work well and last as long as possible. Using the right tools and following the step-by-step steps in this guide, you can remove dirt, grime, and brake pad residue from your disc brakes.
This will let them work at their best. Your bike will be safe and fun if you keep the disc brakes clean and in good working order.
Happy Riding!
