
Handlebar grips are rubber or foam covers on a bike’s handles. Handlebar grips make it easier and safer for cyclists to hold on to the handlebars while going. They help keep your hands from getting tired, dampen movements from the road, and give you better bike control.
Rubber handlebar grips are helpful for cyclists. They make it more comfortable to hold onto the handlebars and improve grip, especially in wet conditions. This allows cyclists to ride for longer without discomfort.
Over time, handlebar grips have evolved with the introduction of various designs and materials. Cyclists now have many options, including ergonomic shapes, textured patterns, and even gel-filled grips that offer enhanced shock absorption.
My article on “how to remove handlebar grips” is helpful for cyclists. It gives a safe, easy-to-follow guide for removing old or worn-out grips. This is important for maintenance because grips may need replacing sometimes.
It’s important to remove the handlebar grips when changing your bike. This includes replacing handlebars, adding accessories, or upgrading parts. Knowing this correctly will help you avoid damaging the grips on the handlebars.
Which Tools Are Used To Remove The Grips?
To remove handlebar grips from a bike, you can use the following tools:
Flathead screwdriver: To remove the grips from the handlebars, use a flathead screwdriver with a thin, flat tip that can fit between the grip and handlebar.
Rubbing alcohol or soapy water: This helps loosen the grip and makes removing it easier. To remove the grip, you can use rubbing alcohol or soapy water as a lubricant to dissolve the adhesive or grip glue.
Rag or towel: To take off the grips, use a rag or towel with rubbing alcohol or soapy water. This will also protect the handlebar surface and provide a better grip.
Pliers (optional): Pliers are only sometimes necessary but can be helpful if the grips are stubborn and difficult to remove. You can use them to grip and twist the grip while pulling it off the handlebar.
How To Remove Handlebar Grips
To remove handlebar grips from your bike using the mentioned tools, follow these step-by-step instructions:
Step 1: Gather the necessary tools
To properly execute the task, it is recommended to have the necessary tools, such as a flathead screwdriver, rubbing alcohol or soapy water, and a rag or towel. Pliers may be needed but are optional. Following these guidelines will ensure a successful outcome.
Step 2: Position the bike
Ensure your bike is in a secure position that will prevent it from tipping over or shifting during work.
Step 3: Assess the grips
It’s important to carefully examine the grips to ensure they’re firmly attached with either adhesive or grip glue. This way, you can make an informed decision on whether to apply lubricant or use additional tools. Ensuring the grips are secure is crucial for your safety and the proper functioning of your equipment.
Step 4: Loosen the grip
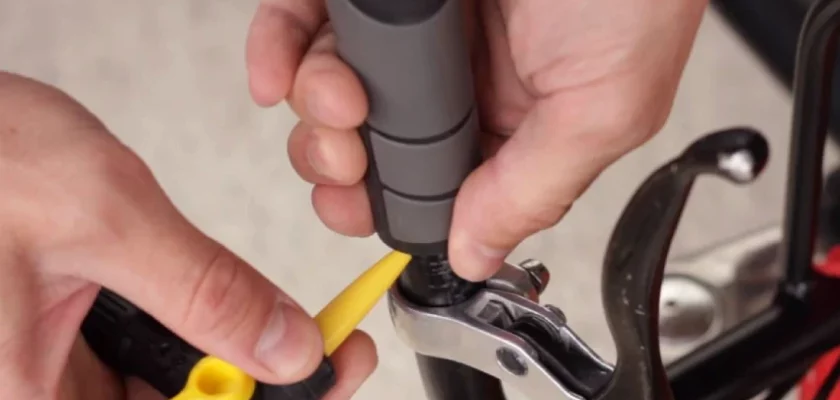
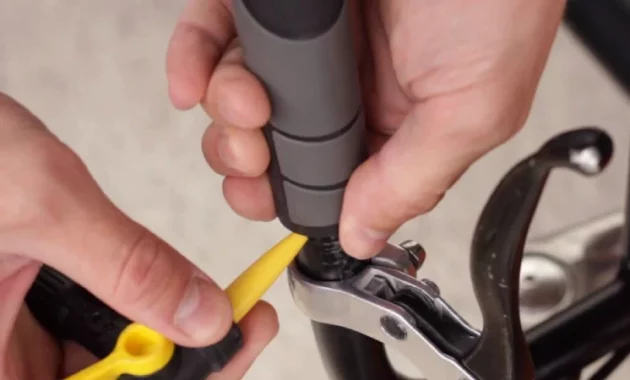
If the grips are not glued on, skip to step 5. For grips secured with adhesive or grip glue, create a gap between the grip and handlebar. Insert the flathead screwdriver between the grip and handlebar at one end.
Step 5: Apply lubricant
If the grips are glued on, follow step 4. Pour rubbing alcohol or soapy water into the gap to dissolve the adhesive or glue. This will make it easier to remove the grips.
Step 6: Slide the grip
To remove the grip from the handlebar, create a gap and add lubricant if needed. Then, firmly grasp the grip and pull it towards you while gently moving it back and forth to loosen it.
Step 7: Use a rag or towel
If the grip is hard to remove, wrap a wet rag or towel around it. This will give you more grip and help you take it off. Twist and pull the grip at the same time until it comes off the handlebar.
Step 8: Pliers (if necessary)
You can use pliers for more force if the grip is hard to remove. Hold the end of the grip with the pliers and twist it while pulling it off the handlebar. Be careful not to harm the grip or handlebar.
Step 9: Clean the handlebar
Use a rag or towel with rubbing alcohol or soapy water to clean the handlebar surface after removing the grips. Ensure complete removal of any remaining residue from the grips or adhesive.
How To Remove Lock-On Handlebar Grips Of A Bike
A lock-on grip is a handlebar grip commonly used in mountain biking and other disciplines where a secure and slip-free grip is essential. Lock-on grips have two main components: an outer grip and an inner clamp.
If your bike has these grips, you can follow these steps to remove them:
Start by loosening the end cap: Find the end cap on the grip of the handlebar. Use a screwdriver or Allen key to reduce it, then gently remove it.
Remove the end cap: Once the end cap is loose, carefully pull it off the handlebar. Set it aside in a safe place where it won’t get lost.
Loosen the grip: Take off the end cap and find the Allen bolt or screw on the grip’s side. Use the correct size Allen key or screwdriver to loosen it. You don’t need to remove it, just enough to slide off the grip.
Slide off the grip: To remove the grip from the handlebar, loosen the bolt or screw first. Then, try to slide it off firmly. If it doesn’t come off quickly, you can wiggle it while pulling, using compressed air, or rubbing alcohol to loosen it.
Can I Use Handlebar Tape Instead Of Grips?
Yes, you can put handlebar tape on your bike instead of grips. Handlebar tape is often used instead of grips and has benefits. It gives you a soft, easy grip, dampens vibrations, and can be wrapped in different ways to make it look nice.
How Often Should I Replace My Handlebar Grips?
Handlebar grips should be replaced every one to two years or when they get old, torn, or lose their grip. How often you replace them depends on how often you use your bike. Checking them regularly and replacing them as needed will ensure you have the best ease, control, and safety while riding.
Final Thoughts
Taking off bike grips might seem like a hard job, but it can be easy if you have the right tools and know how to do it. By following this essay’s step-by-step instructions, riders can confidently remove old or worn-out handlebar grips.
Depending on the type of grip, the process is different. Slip-on grips can be removed by making an air gap and pulling them off. To remove a lock-on grip, loosen the outer clamp and slide it off.
In the end, riders need to know how to take off the grips on their handlebars. Following the steps in this detailed guide, cyclists can easily remove grips, keep their bikes in good shape, and ride safely and comfortably.