
Testing a coil pack may sound daunting, especially if you’re not familiar with the inner workings of your bike’s electrical system. However, with the right knowledge and a few simple tools, you can easily diagnose if your coil pack is faulty and needs to be replaced.
By following the steps we’ll outline, you can save time and money by avoiding unnecessary repairs and get back on the road with a smoothly running motorcycle.
So, without further ado, let’s dive into the world of coil packs and learn how to test a coil pack on a motorcycle effectively. Buckle up, because this informative guide is here to help you troubleshoot your bike’s performance issues and keep you riding smoothly.
Testing A Motorcycle Coil Pack: A Step-By-Step Guide
The coil pack is responsible for generating the high-voltage current needed to create the spark in the spark plugs, which in turn ignites the fuel-air mixture in the engine’s combustion chamber.
If the coil pack fails or malfunctions, it can lead to misfires, reduced performance, and even total engine failure. Therefore, it is essential to know how to test a coil pack on a motorcycle to diagnose and address any issues promptly.
Step 1: Safety First
Before diving into testing your coil pack, it is crucial to prioritize safety. Here are a few safety measures to follow:
- Ensure the motorcycle is on a stable and level surface.
- Disconnect the battery to prevent accidental electric shocks.
- Allow the engine to cool down to avoid burns.
Step 2: Locate the Coil Pack
The next step is to locate the coil pack on your motorcycle. While the exact location may vary depending on the make and model of your bike, you can typically find the coil pack near the engine, either on the frame or near the cylinder head.
Step 3: Check for Visible Damage
Before conducting any tests, visually inspect the coil pack for any signs of damage that may indicate a faulty unit. Look for:
- Cracked or melted insulation on the wires and connectors.
- Corrosion or rust on the metal components.
- Loose or broken electrical connections.
If you notice any of these issues, it is likely that the coil pack needs to be replaced. However, if everything appears to be in good condition, proceed with the testing process.
Step 4: Testing the Primary Circuit
To check the primary circuit of the coil pack, which consists of the power supply and the primary winding, follow these steps:
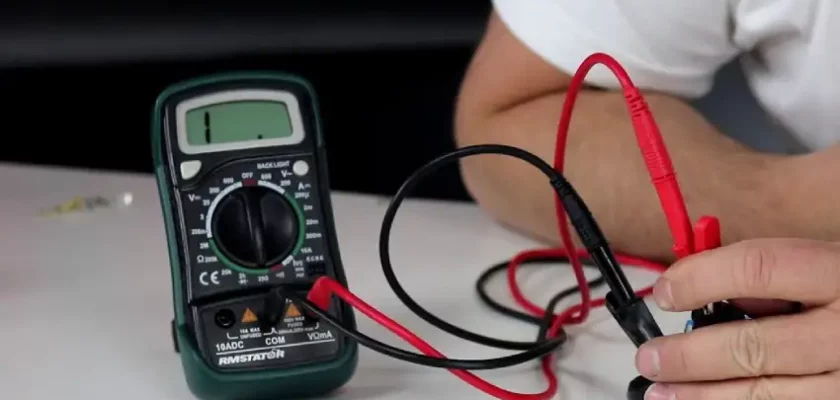
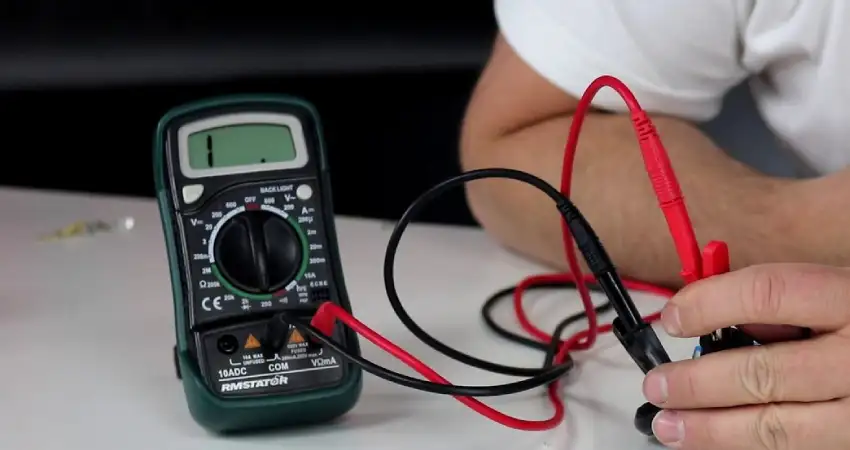
- Set your multimeter to the ohms/resistance setting.
- Place the multimeter’s positive lead on the positive terminal of the coil pack and the negative lead on the negative terminal.
- Check the resistance reading on your multimeter. Most coil packs have a specified resistance range, typically between 0.2 and 3 ohms. Refer to your motorcycle’s service manual for the specific range.
- If the resistance reading is within the specified range, the primary circuit is functioning correctly. However, if the reading shows infinite resistance or falls outside the specified range, it indicates a problem with the coil pack.
Step 5: Testing the Secondary Circuit
Now that you have checked the primary circuit, it’s time to move on to testing the secondary circuit, which includes the secondary winding and the spark plug wires.
- Switch the multimeter to the ohms/resistance setting (higher range).
- Place the positive lead on one of the spark plug wire connectors and the negative lead on the corresponding coil pack terminal.
- Note the resistance reading on the meter.
- Repeat this process for each spark plug wire.
Ideally, the resistance reading should be within the range specified by the manufacturer. If any of the readings show infinite resistance, very high resistance, or are outside the specified range, it indicates a problem with the coil pack.
Step 6: Testing for Spark
In addition to testing the circuitry of the coil pack, it is crucial to ensure that the coil pack is generating the necessary spark. To do this, you will need a spare spark plug:
- Remove one of the spark plugs from your motorcycle. Ensure it is in good condition and properly gapped.
- Connect the spark plug to one of the spark plug wires.
- Ground the spark plug by placing its electrode on a metal surface of the engine.
- Start the engine and observe the spark plug for a visible, strong spark.
If you see a weak or no spark, it indicates a problem with the coil pack and further troubleshooting is needed. However, if the spark is strong and consistent, the coil pack is functioning correctly.
Step 7: Seek Professional Assistance if Necessary
If you have followed the above steps and still suspect a problem with the coil pack, it is recommended to seek professional assistance. A qualified motorcycle technician will have the knowledge, experience, and specialized tools needed to diagnose and resolve complex coil pack issues.
Remember, improper testing or handling of electrical components can cause damage to the motorcycle or even result in personal injury. If you are not confident in your abilities, it is always best to consult a professional.
Frequently Asked Questions
1. How can I test a coil pack on a motorcycle?
To test a coil pack, remove the spark plug wire and insert a spark tester. Start the motorcycle and check for a strong, blue spark. If there’s a weak or inconsistent spark, the coil may be faulty and needs to be replaced.
2. What should I do if I don’t see any spark during the test?
If there’s no spark, start by checking for loose connections or wires. Ensure the coil pack is securely plugged in and the wires are not damaged or frayed. If everything looks good, you may need to replace the coil pack.
3. Can I test the coil pack resistance with a multimeter?
Yes, you can use a multimeter to check the coil pack resistance. Set the meter to the ohm (Ω) setting and place the probes on the corresponding terminals. Compare the reading with the manufacturer’s specifications to determine if the coil pack is within the acceptable range.
4. What should I do if the resistance is outside the acceptable range?
If the resistance is too high or too low, it indicates a problem with the coil pack. In this case, it’s best to replace the faulty coil pack with a new one to ensure optimal performance.
5. Are there any other tests I can perform to confirm if the coil pack is faulty?
Yes, you can perform an insulation test using a megohmmeter to check for any internal short circuits. Additionally, you can swap the coil pack with a known working one to see if the problem follows the coil or stays the same.
Final Thoughts
In conclusion, testing a coil pack on a motorcycle is an essential skill for any rider or mechanic. By following these simple steps, you can easily diagnose and troubleshoot any potential issues with your coil pack.
Remember to begin by inspecting the physical condition and connections, check the resistance values using a multimeter, and perform a spark test. Additionally, make sure to consult your motorcycle’s service manual for specific instructions and values.
By mastering this process, you can ensure optimal performance and avoid breakdowns on the road. So, don’t hesitate to apply these techniques on how to test a coil pack on a motorcycle to keep your ride running smoothly.