

Whether you’re a seasoned cyclist or a beginner, keeping your hub properly tightened is crucial for a smooth and safe ride.
Imagine gliding effortlessly along the roads, the sound of your bike humming beneath you as you confidently navigate every turn. By learning how to tighten your bike hub, you can ensure that your cycling experience remains enjoyable and your bike performs at its best. So, grab your tools, let’s dive into the simple and practical steps to tighten your bike hub.
Tighten Bike Hub: Mastering The Basics
One crucial area that often requires attention is the bike hub. Whether you’re a seasoned rider or a newbie, knowing how to tighten your bike hub is an essential skill to have in your maintenance repertoire.
1. Understanding the Bike Hub
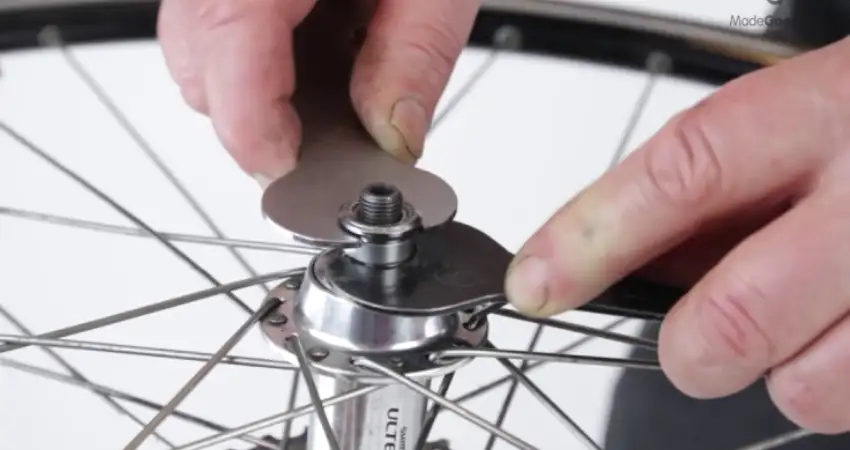
Before we dive into the process of tightening your bike hub, let’s first understand what the hub is and why it’s important. The hub is the central part of the bicycle wheel, located at its center.
It consists of an axle, bearings, and a hub shell that houses these components. The hub ensures smooth movement of the wheel by allowing it to rotate freely on the axle.
Over time, the hub can develop play or looseness due to wear and tear, improper adjustment, or simply regular use. If you notice lateral movement or a wobbly feeling in your wheel, it’s likely that your hub needs tightening.
2. Gathering the Tools
To tighten your bike hub, you’ll need a few basic tools. Make sure to have the following items on hand:
- Adjustable wrench or cone wrench
- Lubricant (grease or oil)
- Rag or paper towels
- Metric ruler or caliper
3. Preparing Your Bike
Before you start working on your bike hub, it’s crucial to prepare your bike for maintenance. Follow these steps:
- Find a clean, well-lit workspace where you can comfortably work on your bike.
- Turn your bike upside down or elevate it using a bike repair stand to have easy access to the wheels.
- Clean the hub area by wiping away any dirt, grit, or grease using a rag or paper towels.
4. Identifying the Type of Hub
Different types of hubs require slightly different approaches when it comes to tightening. The most common types of bike hubs are:
- Quick Release (QR) Hub: These hubs have a lever system for easy wheel removal and installation.
- Thru Axle Hub: Found on modern mountain bikes and some road bikes, these hubs use a threaded axle that must be unscrewed before removing the wheel.
- Threaded Hub: Commonly seen on vintage bikes, these hubs have nuts that thread onto the axle to secure the wheel.
- Internally Geared Hub: These hubs are used on bikes with internal gear systems and may require different tools and procedures, so consult your bike’s manual if you have one.
Identifying the type of hub on your bike will help you understand the specific steps required in the tightening process.
5. Adjusting the Quick Release Hub
If your bike is equipped with a quick-release hub, follow these steps to tighten it:
- Start by opening the lever of the quick-release hub, allowing the wheel to be easily removed.
- Using an adjustable wrench or cone wrench, locate the cone nuts on both sides of the hub. These nuts control the bearing tension.
- Gently tighten the cone nuts on both sides of the hub. Make sure not to overtighten, as this can cause excessive friction and damage the bearings.
- While holding one cone nut in place with a wrench, tighten the locknut against it to secure the adjustment. Be careful not to overtighten the locknut.
- Spin the wheel to check for smooth rotation. There should be no lateral play or binding in the bearings.
- If needed, make small adjustments by repeating steps 3 and 4 until the hub feels tight and the wheel spins smoothly.
- Finally, close the lever of the quick-release hub, making sure it is tight enough to keep the wheel in place.
6. Adjusting the Threaded or Thru Axle Hub
For threaded or thru axle hubs, follow these steps to tighten them:
- If you have a threaded hub, use an adjustable wrench to hold one of the cone nuts in place. Now use another wrench to tighten the opposite nut slightly.
- For thru axle hubs, use the appropriate sized wrench to loosen the axle nuts.
- Hold the cone nut lightly with the wrench to prevent it from turning while tightening the opposite nut or axle.
- Turn the nut or axle a quarter turn clockwise to tighten it, ensuring there is no lateral play in the hub.
- Recheck the tightness by spinning the wheel and testing for play or binding.
- If necessary, make small adjustments by repeating steps 3 and 4 until the hub feels tight and the wheel spins smoothly.
- Tighten the locknut against the cone nut to secure the adjustment, making sure not to overtighten.
7. Lubricating the Hub
Now that you’ve tightened your bike hub, it’s essential to lubricate it to ensure smooth operation. Follow these steps to apply lubrication:
- Using a suitable lubricant like grease or oil, apply a small amount to the bearings and axle.
- Spin the wheel to distribute the lubricant evenly throughout the hub.
- Wipe away any excess lubricant using a rag or paper towels.
8. Regular Maintenance and Inspection
Proper maintenance and regular inspection of your bike hub are crucial for its longevity and performance. Here are a few tips to keep in mind:
- Periodically check the hub for play, wobbling, or unusual noises.
- Inspect the hub for any signs of wear, damage, or corrosion. If any issues are detected, consult a professional bike mechanic for repairs.
- Keep the hub clean and free from debris by wiping it down regularly.
- Reapply lubrication as needed, following the manufacturer’s recommendations.
By following these steps and practicing regular maintenance, you’ll ensure that your bike hub remains tight and in optimal condition for many rides to come.
Remember, if you feel unsure or uncomfortable with any of the steps mentioned above, it’s always best to consult a professional bike mechanic who can assist you in tightening your bike hub properly.
Now, give those wheels a spin and enjoy your ride!
Frequently Asked Questions
1: How do I know if my bike hub needs tightening?
Check for any play or looseness in the hub by grasping the wheel and moving it side to side. If you feel any movement, it’s an indication that the hub needs tightening.
2: What tools do I need to tighten my bike hub?
You will need a cone wrench, an adjustable wrench, and a rag to clean the hub before tightening. It’s important to use the correct size cone wrench for your specific hub.
3: How do I tighten the hub on a front wheel?
First, remove the quick-release skewer or nuts holding the wheel in place. Then, use the cone wrench to hold the cone in place while using the adjustable wrench to tighten the locknut firmly. Make sure the hub spins smoothly before reattaching the wheel.
4: How do I tighten the hub on a rear wheel with gears?
Start by shifting the chain onto the smallest rear cog. Follow the same steps as for the front hub, tightening the locknut after holding the cone in place. Remember to check that the gears still shift properly after tightening the hub.
5: How often should I tighten my bike hub?
It is recommended to check and tighten your bike hub every 3-6 months, depending on your riding frequency and conditions. Regular maintenance helps prevent excessive wear and ensures a smooth riding experience.
Final Thoughts
To conclude, tightening the bike hub is a crucial maintenance task that every cyclist should know how to do. By regularly checking and tightening the hub, riders can ensure smooth and efficient rides, as well as extend the lifespan of their bike. Remember, a loose hub can lead to wobbly wheels, inefficient power transfer, and even accidents.
To tighten the bike hub, start by removing the wheel and inspecting the cone and locknut. Using the appropriate wrenches, gradually tighten the locknut while holding the cone steady.
Then, reassemble the wheel and test for any play or wobbling. Repeat the process if necessary. By following these steps and proactively checking the hub, cyclists can enjoy safer and more enjoyable rides.
