
Bicycles are amazing tools that must be taken care of regularly to ensure they work well and are safe. One important part of bike upkeep is making sure the spokes are tight. The spokes are very important for keeping the wheel stable and robust.
Loose spokes can cause a wheel to be out of balance, which can cause wobbling, less control, and even crashes. This detailed article looks at steps to tighten bike spokes and ensure the wheel is correctly tensioned.
What Happens If You Ride A Bike With Loose Spokes?
When riding a bike with loose spokes, there can be various consequences, ranging from minor issues to potentially dangerous situations. Below are some potential outcomes that may occur when riding a bike with loose spokes:
Wheel misalignment: Loose spokes can cause the wheel to be out of true or misaligned. This means the wheel might wobble or have uneven tension, making the bike less stable and harder to control. If a wheel isn’t lined up right, it can be hard to control the bike and make it more likely that you’ll get into an accident.
Increased stress on other components: If the spokes are loose, it can cause extra stress on different parts of the bike, like the hub, rim, and frame. This can lead to those parts wearing out and breaking sooner than they should, which can be costly.
Wheel damage: Loose spokes can bend the rim and warp while riding. This bending can cause the rim’s braking surface to wear unevenly, making it less effective and dangerous. In extreme cases, the rim may get broken or bent and must be replaced.
Increased likelihood of spoke failure: Loose spokes are likely to break or snap when stressed. This can cause a wheel to break suddenly, leading to a loss of control and crashes or injuries. Broken spokes can also get stuck in the gears or other parts of the bike, which makes the problem even worse.
Decreased efficiency and performance: Loose spokes can cause more friction and drag, making the bike less efficient. This means you must work harder to keep the same speed, hurting your performance and making riding less fun.
How To Identify Which Spokes Of A Bike Need Tightening
To identify which spokes need tightening on your bike, you can follow these steps:
Inspect the spokes visually: Check the spokes for any loose or damaged ones by looking closely while the bike is not moving. Look for gaps or movement when pushing or pulling on them.
Check for wheel wobbling: Turn the wheel and watch it closely. If the wheel shakes or looks uneven, it could mean that some of the spokes are loose or not tightened evenly.
Listen for unusual sounds: While riding the bike, listen for any unusual noises from the wheel area. Loose spokes can sometimes create clicking, rattling, or pinging sounds as they move against each other or the wheel components.
Perform a manual check: Firmly squeeze pairs of adjacent spokes together using your hand. Compare the tension and feel of the spokes throughout the wheel. Loose spokes will typically feel noticeably less tense than the others.
Use a spoke wrench: If you can access a spoke wrench, you can systematically check and tighten each spoke individually. Turn the spoke wrench in small increments clockwise to increase tension on the loose spokes. Be careful not to overtighten the spokes, as it can cause problems.
Tools
To tighten bike spokes, you will need the following tools:
Spoke wrench: A spoke wrench is a tool that fits small nuts at the rim of a wheel. The wrench comes in different sizes to fit different nut dimensions, and it’s essential to use the correct size to avoid damage.
Screwdriver or similar object (optional): A spoke wrench is the best tool for adjusting spoke tension. Sometimes a flathead screwdriver can work for minor adjustments, but it could be more accurate and damage the spokes.
How To Tighten Bike Spokes – Process
Tightening the spokes of a bicycle wheel requires a spoke wrench and, optionally, a screwdriver for minor adjustments. Follow the step-by-step process below:
Step 1: Gather The Tools
Ensure you have the right tools, like a spoke wrench and screwdriver (if required). Confirm the spoke wrench fits the nuts on your wheel.
Step 2: Secure The Wheel
To make it easier to work on a wheel, flip over or put the bicycle in a bike stand if it’s standing upright. This will make it more stable and convenient.
Step 3: Identify Loose Spokes
Check the wheel for loose spokes. They make a different sound than tight spokes when plucked. Also, look for any wobbling or unevenness in the rim.
Step 4: Determine Spoke Adjustment Direction
To tighten a spoke:
Turn the nipple clockwise.
Remember that the left side spokes are tightened by turning the nipple counterclockwise, while the right side spokes are tightened by turning the nipple clockwise.
Keep this in mind as you work.
Step 5: Locate The Loose Spokes
Look at the valve hole on the rim where the inner tube’s valve sticks out. Find the loose spokes by looking for a gap between the nipple and the rim. This means the spokes need to be tight enough.
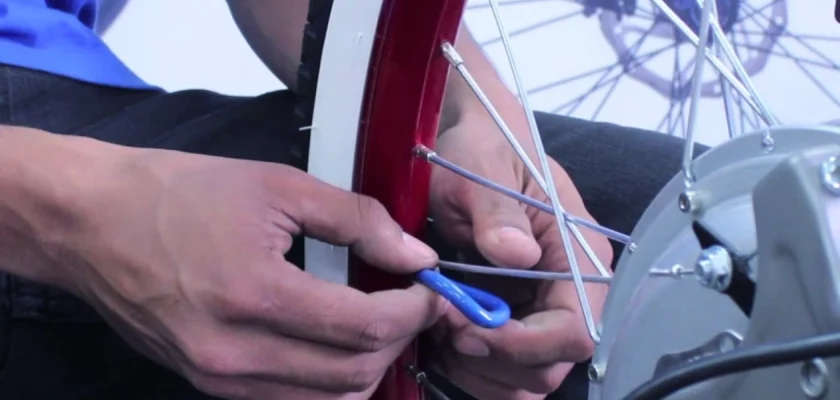
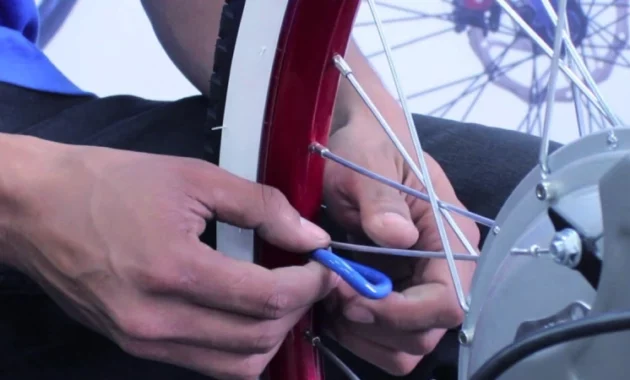
Step 6: Position The Wrench
Put the spoke wrench onto the loose spoke’s nipple, ensuring it fits well. Be careful not to strip or round off the edges of the nipple by aligning the wrench properly.
Step 7: Tighten The Spoke
To tighten the spoke:
Use the spoke wrench and turn it gently and evenly in a clockwise direction.
Don’t use too much force to avoid damaging the nipple or spoke.
Make minor adjustments by turning the wrench no more than half a turn at a time.
Step 8: Check The Tension
After tightening the spoke, pluck it to assess its tension. It should produce a similar pitch to the surrounding spokes. If it’s too tight, it may make a higher-pitched sound; if it’s too loose, it may sound lower. Aim for consistent tension across all spokes.
Step 9: Repeat The Process
Continue moving to the next loose spoke adjacent to the one you just tightened. Repeat steps 6-8 for each spoke until you have addressed all the loose spokes around the wheel.
Step 10: Assess Trueness
After tightening all the loose spokes, spin the wheel and check for any wobbling or irregularities. If there are any, tighten the remaining loose spokes until the wheel runs smoothly without any significant sideways or up-and-down movement.
Step 11: Optional Fine Adjustments
If you have a screwdriver, you can make minor adjustments by inserting it into the spoke nipple and turning it slightly. This method can be more accurate for fine-tuning the tension of specific spokes.
Step 12: Final Check
After making all the adjustments, double-check the tension and trueness of the wheel. Spin it again to ensure it runs smoothly and without any noticeable wobbling.
How Often Should I Fix The Spokes On My Bicycle?
The spokes are tight based on many things, like how you ride and how good the wheels are. Generally, riders who ride their bikes often should check and fix the spoke tension every 1,000 to 2,000 miles or every few months. Also, checking the spokes after any big crash or hit is a good idea.
Can I Tighten My Bike Spokes Without A Spoke Wrench?
No, you can’t make the spokes on your bike tighter without a spoke wrench. The spoke nipple is like a small nut that can be tightened with a spoke wrench by turning it clockwise.
Final Thought
Spoke tightening is a key task that adds to your bicycle’s overall performance and safety, and it should be performed at least once per ride. You can effectively tighten loose spokes if you follow the step-by-step approach provided in this detailed guide.
This will ensure that the wheel is balanced and your riding experience will be smoother.
By doing routine maintenance on your spokes, you may extend the life of your wheels, making for a more pleasurable and secure cycling experience overall.