

Bicycle handlebars are the bike part that the rider uses to move and control where the bike goes. They are usually at the front of the bike and are connected to the frame by the stem.
Bike handlebars can become loose over time because of vibrations from riding on rough ground, regular use, or not tightening them enough when they were first put on. Loose handlebars can cause several problems, such as less control and a lower level of safety while riding.
To ensure a safe and comfortable bike ride, it is crucial to tighten the handlebars properly. Loose handlebars can result in loss of control and accidents, whereas overly tight handlebars can limit maneuverability.
In this article, I will outline instructions on how to tighten bike handlebars effectively, allowing you to enjoy a smooth and secure ride.
Why Do Bike Handlebars Get Loose?
Handlebars on a bike can become loose due to normal wear and tear, improper fitting, or inadequate tightening. These are the most common reasons why handlebars can become loose.
Insufficient tightening when putting the bike together: If the handlebars weren’t tightened enough when the bike was first put together or adjusted later, they might loosen over time.
Vibrations: When you ride your bike often, the handlebar stem can become looser over time because of the vibrations. These vibrations can happen when riding on rough ground, going over bumps, or even when the bike is moving.
Impacts or crashes: If the bike takes a big hit or gets into a crash, the handlebars can move or come free. After an accident, checking for any damage or misalignment is essential.
Expanding and contracting of materials: Materials can grow or shrink because of temperature changes. For example, metal and carbon fiber can increase or shrink. This can change how tight the handlebars are over time.
Age and wear: As bikes get older, parts wear out, like the parts that hold the handlebars in place. Bolts can get worn or stripped, which makes them less able to keep the handlebars together.
How To Know If Your Handlebars Are Loose?
If you suspect that your bike handlebars are getting loose, there are some signs to look out for:
The steering feels unstable: If your bike’s steering feels wobbly or unstable, it could mean that the handlebars are loose. When the handlebars are tightened enough, turning should feel stable and quick.
Rattling or clicking sounds: Loose handlebars can make rattling or clicking sounds when you ride over bumps or rough ground. If your handlebars are making strange noises, check if they are free.
Handlebars move on their own: You can feel if the handlebars are free by holding them tightly and trying to move them side to side or up and down. You may need to tighten the wheels if you can see that the wheels move or wiggle.
Slippage or misalignment: If the handlebars slip or move out of place while you’re riding, it could be a sign that they are too free. This can make keeping your balance and control hard, so you need to deal with it quickly.
Tools Required
You can use various methods to complete the task, but these tools make it the most comfortable. Generally, you will require the following tools to adjust the handlebars on a bike:
Allen wrenches (hex keys): Most bikes’ handlebar clamps and stem nuts are made with hex bolts. Depending on the parts of your bike, you might need different types of Allen wrenches. 4mm, 5mm, and 6mm are all common sizes.
Torque wrench: You need a torque wrench to tighten bolts to the specifications suggested by the manufacturer. It ensures you don’t over tighten or under-tighten the nuts, so damage or safety risks don’t happen. Ensure your torque wrench has the proper handlebar and stem nuts range on your bike.
Adjustable wrench or socket wrench: You may sometimes require an adjustable wrench or socket wrench to tighten bolts or nuts. These tools help make alterations or repair components on your bike.
Screwdriver: Depending on how your bike is made, you might need a screwdriver to change the handlebars or get to specific bolts.
Grease: Putting a small layer of grease on the area where the handlebar clamps can help reduce friction and make installing and adjusting the bike easier. It is suggested to use lubricant made for bicycles.
Optional: Thread-locking compound (like Loctite): You can use a thread-locking compound to ensure that things don’t come loose because of movements. This isn’t needed for every bike, but it can help stabilize the bike.
How To Adjust Bike Handlebars
Here is a step-by-step guide on how to use the tools listed to tighten bike handlebars:
Step 1: Get the tools you need
Make sure you have all the tools you need, such as the right-sized Allen wrenches (hex keys), a torque wrench, an adjustable wrench or socket wrench, a screwdriver (if required), grease, and, if you want, thread-locking compound.
Step 2: Loosen the screws
Start by removing the bolts on the handlebar clamp or stem with the right size Allen wrench. Loosen them enough so that they can be moved, but don’t take them off entirely.
Step 3: Put the wheels in place
Carefully move the handlebars to the angle and position you want. Please ensure they are straight and in the same place as the front wheel and the body of the bike.
Step 4: Put the stem in place
Check how well the stem is lined up with the front wheel. Make sure it is in the middle and in line with the body of the bike. Make any necessary changes to get the orientation right.
Step 5: Put some grease on
Put a small layer of grease on the part of the stem where the handlebar clamps will touch. This will cut down on friction and make adjusting and tightening easy.
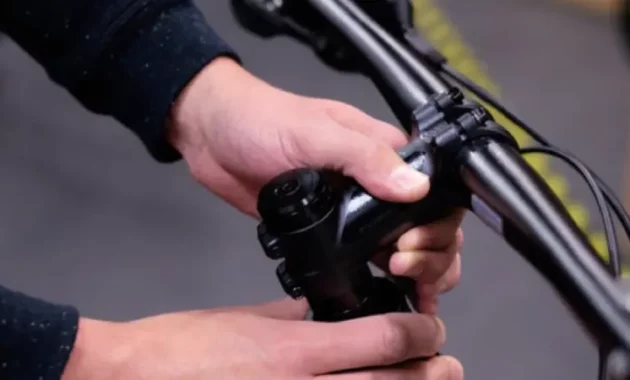
Step 6: Tighten the clamp bolts on the handlebars
Using an Allen wrench, tighten the clamp bolts on the handlebars in a design that alternates. Start with a tight fit, then slowly tighten each bolt until they are all the same amount. Be careful not to overtighten because that can hurt the parts.
Step 7: Use a torque wrench
Use a torque wrench to ensure the handlebar clamp bolts are tightened to the specs recommended by the manufacturer. Look in the bike’s manual or ask a professional for the exact torque number.
Step 8: Make sure the screws are tight enough
Ensure the handlebars are tight by giving them a light push and looking for movement or play. If you need to, make small changes and fix them as needed.
Step 9: You can use thread-locking powder if you want to
You can put a small amount of thread-locking compound (like Loctite) on the clamp nuts for the handlebars. This will make it harder for things to come loose because of movements. Follow the directions on the package to use the product correctly.
Step 10: Check all nuts twice
Before you ride, ensure all bolts, including the stem bolts and any other connected bolts, are tightened. During the final check, look for signs of something loose or moving.
Final Words
Tightening the handlebars on your bike is an easy task that can make riding much safer and easier by giving you more control. By following the step-by-step steps in this detailed guide, you’ll be able to tighten the handlebars on your bike with confidence.
Take your time, don’t overtighten, and get help from a professional if you’re not sure what to do or are having trouble. Checking and fixing your bike’s handlebars on a regular basis will help make your rides safer and more fun.
