
Have you ever found yourself in the middle of the woods, enjoying an exhilarating mountain bike ride, only to be faced with a sudden brake failure? It’s a terrifying situation that no rider wants to experience. But fear not, because today I’m going to show you how to bleed mountain bike brakes without a kit.
Imagine this: You’re deep in the heart of nature, surrounded by lush greenery and breathtaking trails. The adrenaline is pumping through your veins as you navigate the rough terrain on your trusty mountain bike.
Suddenly, you realize that your brakes are feeling a bit squishy and unresponsive. Panic sets in as you try to come to a halt. But fear not, my friend, for I have a solution that will save your ride and keep you safe.
In this article, we’re going to dive into the world of bleeding mountain bike brakes without a kit. Yes, you heard that right – you don’t need a fancy toolkit or specialized equipment to get the job done.
With a few simple tools and a little know-how, you’ll be back on the trails in no time, with brakes that stop on a dime. So, let’s get started on learning how to bleed mountain bike brakes without a kit!
Bleed Mtb Brakes: No Kit Needed

If you’re an avid mountain biker, you know how crucial it is to have a properly functioning brake system. Over time, air bubbles can develop in the brake lines, compromising your ability to stop effectively. While bleeding your mountain bike brakes may seem like a daunting task, it’s actually quite manageable, even without a kit.
Gather the Necessary Tools
Before you start bleeding your mountain bike brakes, gather the necessary tools to perform the job efficiently. Although you might not have a dedicated brake bleeding kit, some basic tools can still get the job done. Here’s what you’ll need:
- A 4mm Allen wrench to remove the brake caliper from your bike frame
- A small flathead screwdriver to pry open the brake pads (only for certain brake systems)
- A 7mm wrench or a brake pad spacer to push the pistons back into position
- A bottle of high-quality brake fluid recommended by your bike manufacturer
- A piece of clear tubing or a syringe
- Gloves to keep your hands clean throughout the process
Prepare Your Bike for the Bleeding Process
To ensure a smooth bleeding process, it’s essential to prepare your bike properly. Follow these steps:
1. Find a clean workspace: Choose a well-lit area with enough space for your bike and tools. Lay down a clean towel or an old rag to prevent any brake fluid from damaging the surface.
2. Secure your bike: Use a bike stand or flip your bike upside down and rest it on the handlebars and saddle. Ensuring stability will facilitate the bleeding process.
Remove the Brake Pads
Before bleeding the brakes, it’s crucial to remove the brake pads. This step prevents any accidental damage or contamination during the bleeding process. Follow these steps:
1. Loosen the brake caliper: Use the 4mm Allen wrench to undo the bolts holding the brake caliper in place. Gently slide the caliper off the brake rotor, making sure not to damage the brake line.
2. Use a flathead screwdriver (if required): Some brake systems, like Avid and SRAM, have a retaining pin holding the pads in place. Use the small flathead screwdriver to pry open the retaining pin and remove the brake pads.
Push Pistons Back into Position
Once the brake pads are removed, the next step is to ensure the pistons are fully depressed. This process will make room for the new brake fluid during bleeding. Follow these steps:
1. Use a wrench or a brake pad spacer: Depending on your brake system, you can use a 7mm wrench or a brake pad spacer to push the pistons back into position. Insert the tool between the pistons and push gently until they are fully compressed.
2. Pay attention to the right position: Take note of the position of the pistons before pushing them back. This step will help prevent issues like misalignment or unequal piston movement.
Prepare the Brake System for Bleeding
Now that your bike is prepped, it’s time to prepare the brake system for bleeding. Follow these steps:
1. Attach the clear tubing or syringe: If using clear tubing, connect one end to the bleed nipple on the brake caliper and place the other end into a container to catch the old brake fluid. Alternatively, if using a syringe, attach it directly to the bleed nipple.
2. Open the bleed port: Locate the brake fluid reservoir on your bike’s handlebars and open the bleed port. This process will prevent any vacuum formation and aid in the bleeding process.
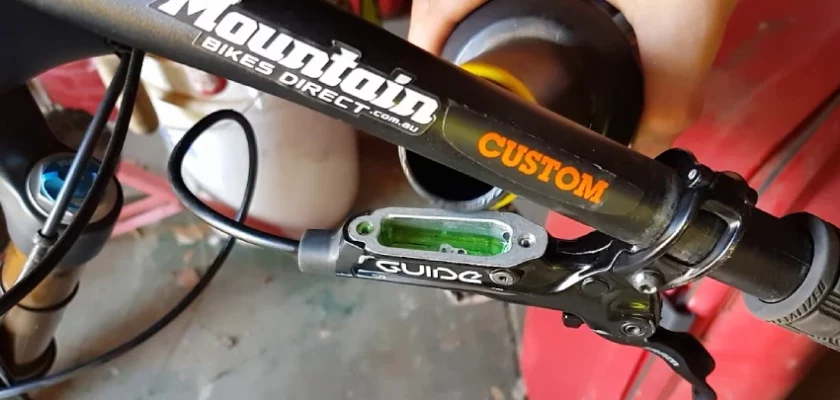
Bleed the Brakes
With your bike properly prepared, it’s time to start bleeding your mountain bike brakes. Follow these steps:
1. Pump the brake lever: Start by squeezing and releasing the brake lever several times. This action will help build pressure within the brake system.
2. Bleed from the bottom up: From the brake caliper, have a friend or use a zip tie to secure the brake lever in the squeezed position. This step will keep the lever engaged and prevent air from entering the system.
3. Begin bleeding: Open the bleed nipple with an 8mm wrench and observe the fluid flow. Keep an eye on any air bubbles that may emerge from the clear tubing or syringe. Continue bleeding until you observe a consistent flow of clean brake fluid.
4. Tighten the bleed nipple: Once the bleeding is complete, use the 8mm wrench to tighten the bleed nipple securely.
5. Repeat the process if necessary: If you spot any remaining air bubbles in the brake fluid, repeat the bleeding process until the fluid runs clear and bubble-free.
Reassemble and Test
With the bleeding process complete, it’s time to reassemble your mountain bike’s brake system and ensure everything is working correctly. Follow these steps:
1. Remove the clear tubing or syringe: Disconnect the clear tubing from the brake caliper bleed nipple or remove the syringe.
2. Replace the brake pads: Insert the brake pads back into the caliper and secure them with the retaining pin (if applicable).
3. Reinstall the brake caliper: Align the brake caliper with the mounting points on your bike frame. Tighten the bolts securely using the 4mm Allen wrench.
4. Test the brake lever and pads: Squeeze the brake lever several times to ensure it engages and disengages smoothly. Check that the brake pads respond correctly when the lever is squeezed.
5. Bed the brake pads (if required): If you notice any inconsistent braking performance, consider bedding the brake pads. This process involves riding your bike at moderate speeds and applying the brakes to transfer a thin layer of brake pad material onto the rotor, enhancing performance.
Regular Brake Maintenance
Remember that proper maintenance is key to enjoying reliable brake performance on your mountain bike. Here are some additional tips:
- Regularly inspect your brake pads for wear and replace them if necessary.
- Keep your brake rotors clean and free from debris or oil contamination.
- Check and adjust brake lever reach to suit your preferences and riding style.
- Consider bleeding your mountain bike brakes at least once a year, even if they’re not showing signs of air bubbles or performance issues.
By following these steps and performing regular maintenance, you can ensure that your mountain bike brakes will consistently provide optimal stopping power, giving you peace of mind on every trail ride. Happy cycling!
Frequently Asked Questions
1. How can I bleed my mountain bike brakes without a kit?
To bleed your mountain bike brakes without a kit, you can use a syringe or a clean bottle with a small hole at the bottom to create pressure. Attach a tube to the brake caliper bleed nipple and push the fluid up through the brake system, removing any air bubbles.
2. Can I use any type of brake fluid to bleed my mountain bike brakes without a kit?
It is important to use the correct type of brake fluid recommended by the manufacturer. DOT brake fluid is generally used in hydraulic disc brakes, while mineral oil is used in some systems. Check your brake manufacturer’s specifications to ensure you use the correct fluid.
3. How do I know if my mountain bike brakes need bleeding?
If your mountain bike brakes feel spongy or lack stopping power, it could be an indication that air bubbles have entered the brake system. Bleeding the brakes can help resolve this issue and restore optimal performance.
4. Are there any specific tools required to bleed mountain bike brakes without a kit?
Other than the brake fluid and a tube, you may need a set of Allen wrenches to access the brake caliper bleed nipple and a small container to collect the fluid. Ensure that all tools used are clean to prevent contamination of the brake system.
5. Can I bleed my mountain bike brakes without any prior experience?
While bleeding brakes without a kit is possible, it does require some basic knowledge of the brake system. If you are unsure, it is recommended to seek help from a professional bike mechanic to avoid any damage or improper bleeding of the brakes.
Final Thoughts
In conclusion, bleeding mountain bike brakes without a kit is possible and can be done with just a few household items. By following the step-by-step process discussed in this article, riders can save time and money by performing this essential maintenance task on their own.
Remember to have a clean workspace, use the right tools, and take your time to ensure a proper bleed.
The process might seem daunting at first, but with practice, it becomes easier and more efficient. Regularly bleeding your mountain bike brakes without a kit helps maintain optimal performance and safety on your rides.
So, don’t be afraid to get your hands dirty and give it a try. With the right knowledge and a little patience, anyone can successfully bleed their mountain bike brakes without a kit.